make a break for it

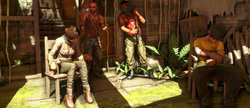
Make A Break For It is the first Mission in Far Cry 3 and follows the events which happened immediately after Jason and his friends arrived at Rook Island After a short cutscene which shows Jason and his friends alive and enjoying their trip, Jason finds himself tied up in a cage with his older brother- Grant, Vaas shows up, displays his knowledge of the entire group of friends, and takes off. Grant ends up knocking a guard out, taking his keys, and this is where the gameplay begins.
OBJECTIVES
OBJECTIVES
- Follow Grant. Avoid getting caught.
- Grab the map on the table.
- Throw a rock to lure the guard away from the window.
- Lure the guards away from the exit.
- Run into the jungle.
- Go through the jungle.
- Cross the river.
- After you and Grant break out of the cage, you will have to follow Grant. Make sure you stay crouched as you follow him, as this reduces noise and visibility. There are several enemies on your way out who will spot you if you approach them too closely or are standing up. A tip will eventually show up which informs you of your Detection meter. This is prominently displayed near your crosshair, and will fill up depending on how aware the enemy is of your presence.
- Eventually you'll end up at a small hut with supplies on a nearby table. Grant will pick up a knife, and you'll be required to pick up the remaining items, including a map of the island. After you've picked up the map, continue to follow Grant, once again avoiding getting caught.
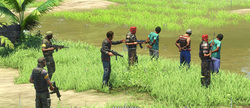
- After awhile, you'll come upon a guard leaning against a window. Grant will instruct you to throw a rock off toward the right in order to lure the guard away from the window so you can climb through it without notice. Throw the rock, and as soon as Grant instructs you, follow him toward the window and climb through it. A guard will spot you in this building, but will immediately be killed by Grant. As you approach the next building, if you look off toward the left, you'll notice Vaas executing three people. Climb up the creates with Grant, and then through the window. Off toward the left are guards watching television, sneak out the door to the right, and do not alert them of your presence.
- As you exit this building, Grant will veer off toward the right and sneak through some foliage. Foliage allows you to hide easily and blocks the enemy's line of sight. Two guards will be standing near the exit of the camp. Once again, throw a rock off toward the right of the guards to lure them away from the exit. Once the rock is thrown and Grant gives the queue, follow him toward the exit and off toward freedom.
Once you get past the bridge and vehicles, a cutscene will begin. During the cutscene, Grant will be shot in the neck by Vaas, and you must cover the wound with your hands in order to prevent him from bleeding out. After he dies, you must escape from the camp by running into the jungle.
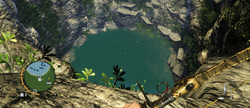
As you run through the jungle, you'll be shot at from behind. So long as you're running, you won't die. Eventually you'll approach a rock lying in the middle of the path that you must jump over. After jumping over this, your character will slide down a hill, hit the ground, and the screen will appear black for a few seconds. After this, you'll continue to run through the jungle. There's eventually a gap you must clear, and vines you must climb. After climbing the vines, you'll approach a smile tunnel in a mountain you must crawl through. If you've been prompted with a message to heal yourself, it's recommended you do so in this tunnel. - Once you've gotten through the tunnel, a man will jump down and attempt to kill you with a knife. You must turn the knife on him, and kill him. After this, you'll approach a wooden bridge. After nearly making it to the other side, the bridge will collapse, leading you into a cutscene in which you plummet to the bottom of a ravine into a river. The mission ends with Jason's body floating downstream and eventually being picked up by Dennis.
down in amanaki town

Down In Amanaki Town is the second Mission in Far Cry 3. It begins with a brief cutscene in which Jason is introduced to the person who saved his life- Dennis. Dennis introduces himself and the Rakyat people, gives you $60, and allows you to purchase a gun. This is where the mission's events begin.
OBJECTIVES
OBJECTIVES
- Buy a 1911 handgun at the store.
- Follow Dennis out of the village.
- Go to the radio tower.
- Get to the top of the radio tower.
- Disable the scrambler.
- Use the zipline to reach the ground faster.
- Talk to Dennis.
- Open the world map.
- After Dennis has given you $60 to purchase a gun, visit the shop just directly in front of you, speak to the clerk, and purchase a 1911 handgun. After you've purchased the gun, head back outside and follow Dennis out of the village.
- After a short while, you'll reach the outskirts of the village. Once you're here, Dennis will tell you to go to the nearby radio tower. Just follow the path toward the radio tower, and you'll eventually wield the gun you recently purchased. Look out for money and item chests on the way to the tower. Remember, this is an open world game, and there are going to be hidden items scattered throughout the world. This walkthrough will not tell you where all of the money and item chests are. This will simply guide you through the game's missions.
- Once you reach the radio tower, you will be instructed to climb up to the top of it. Near the stairs is a snake. Shoot it twice to kill it (amount of shots varies based on game difficulty). Near the base of the tower are two item chests, and a shack which also houses an item chest. As you climb the tower, there will be one final ladder you must ascend to reach the top. Near the bottom of this ladder is an item chest.
- Once you reach the top of the tower, you will be instructed to disable the scrambler. Disabling scramblers at radio towers reveals locations in the region near the tower. Disable the scrambler to activate the tower, and you will be awarded with 500xp. Use the zipline to reach the ground faster, speak with Dennis, and open up the world map. Hover over the area with the image of the boar near the center of the bottom of the region unlocked, and set a waypoint. Close the map, and the mission will end.
hARVEST THE JUNGLE
Harvest The Jungle is the third Missions in Far Cry 3. It begins right where the previous mission left you off. After placing a waypoint over the boar hunting grounds, you must travel to the area, which is just southeast of the location you begin in.
OBJECTIVES
OBJECTIVES
- Reach the hunting ground.
- Kill and skin 2 boars, then collect the 3 types of plants in the hunting ground.
- Fast travel to Amanaki and meet with Dennis.
- Talk to Dennis.
- Use the crafting menu to craft some medicine syringes.
- Craft a Simple Loot Rucksack.
- Get in the truck.
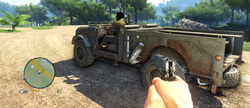
- The hunting grounds are just southeast of your location. Fortunately there's a vehicle nearby, as indicated by the jeep icon on your mini-map. Run to toward the car and enter through the driver's seat. Instructions on how to operate the vehicle will appear, and you're set. Drive down the road, take a left at the crossroads, and continue to follow the road until you reach a wooden bridge. It's recommended that you get out and walk from here, as most esteemed hunters don't run their prey down with their cars. Head east until you reach the hunting ground, indicated by the yellow marker on your mini-map.
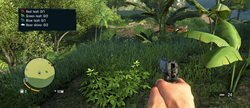
- You must collect the following for this mission:
- You must collect the following for this mission:
- Red leaf: 1
- Green leaf: 2
- Blue leaf: 1
- Boar skins: 2
- The leaves are marked for you on the mini-map. It's recommended that you acquire the leaves first, as they can be found outside the hunting ground. In order to acquire the boar skins, kill a boar, then approach its body. An option to skin it should be available. Be warned, the boars will run away from you once they hear the gunshot. If you run out of bullets before killing the two needed boars, there are several chests located nearby with ammunition in them. These are indicated on your mini-map by diamonds.
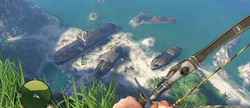
The blue leaves can be found just east of the hunting ground in the river.
After you've gathered all the required leaves and boar skins, fast travel to Amanaki and meet with Dennis by accessing your world map. Speak to Dennis once you arrive. Dennis will instruct you to craft some syringes. Do this by accessing the crafting section in the main menu and selecting "Medicine".
Once you've finished crafting the medicine, you will be told to craft a Simple Loot Rucksack. This is one tab over from the medicine. Once you've done this, you will be brought to a screen which displays your three skill trees. You should have about 2 skill points to spend. You will have to visit the middle tree titled "The Shark", and spend a skill point in a skill titled "Takedown". This skill will allow you to silently dispatch enemies, thus receiving x3 XP per kill. In order to silently kill enemies, you will have to approach them from behind without being detected. You may spend your second point as you wish.
After you've spent your second point, if you had two, speak with Dennis. After you've spoken with Dennis, get into the passenger seat of the truck he is driving. Dennis will drive the two of you down the road for awhile, until you reach an outpost and your mission ends.
secure the outpost
Secure The Outpost is the fourth Mission in Far Cry 3. It begins right where the previous mission left off. After spending your first two skill points, you'll speak to Dennis, who will make plans with you to liberate a nearby outpost.
OBJECTIVES
OBJECTIVES
- Eliminate all pirates in the outpost.
- Search for Liza in the main outpost building.
- Dennis has just driven you to a nearby outpost, and your objective is to eliminate all of the pirates within this outpost.
- As you take out the pirates, remember that crouching will allow you to sneak up on your enemies and eliminate them silently, and that securing the outpost without alerting any enemies will reward you with bonus XP. Once you've killed every pirate within the outpost, you will liberate it, and be awarded with an amount of XP dependent upon whether or not you were detected.
Following the outpost's liberation, search for Liza, your girlfriend, in the main outpost building. After a brief cutscene, Liza isn't found within the building, and the mission ends.
mushrooms in the deep

Mushrooms In The Deep is the fifth Mission in Far Cry 3. It begins right where the previous mission left off. After discovering your girlfriend Liza was not where she was suggested to be, you must speak to Dr. Earnhardt.
OBJECTIVES
OBJECTIVES
- Go talk to Dr. Earnhardt.
- Go see Daisy.
- Find an entrance to the cave.
- Explore the cave to find the mushrooms.
- Find the mushrooms.
- Return to Dr. Earnhardt at the Greenhouse.
- Reach the top of the cliffs to return to Dr. Earnhardt.
- Meet with Daisy.
- Dr. Earnhardt is located far east of your location, so it's recommended that you fast travel to Amanaki Town, and reach Dr. Earnhardt from there. If you choose to fast travel to Amanaki Town, you can exit the town just south of your safe house. Here you will also find a car to drive to Dr. Earnhardt. Once again, he's rather far away, and it's recommended that you fast travel to the closest location to his waypoint.
- If you've chosen to take the scenic route, and hopped into that car just south of the Amanaki Town safe house, just across the river and near the beach is a dock with one motor boat that you can use to reach the goal. On your way there, you can also stop by the nearby radio tower if you so choose to. Activating it will open up a huge chunk of the world map and unlock several new items purchasable in Stores. Just the like the first radio tower in Down in the town, every other radio tower includes a zipline as an easy way down. Take the zipline down, and be on your way. Dr. Earnhardt should be just west of the location the zipline left you off at, and it shouldn't be too difficult to steal a jeep from nearby pirates.
- As you might have noticed looting corpses and chests recently, your wallet has a carrying capacity, as do your bags. Expand the amount of money that you can carry in your wallet by obtaining a pig hide and crafting a simple wallet.
- Once you've located Dr. Earnhardt's home, go toward the right of his home into the greenhouse. Once you enter, a cutscene will be initiated in which Dr. Earnhardt attempts to sell you hallucinogens. He eventually informs you that one of your friends is in his home, but it's not Liza, it's Daisy.
- Leave the greenhouse, and enter Dr. Earnhardt's home through the front door. Daisy can be found up on the second story. Once you enter the second story bedroom, another cutscene will be initiated in which Dr. Earnhardt informs you that Daisy has cut her arm on a poisonous plant and that you must travel to caves just west of his home and acquire cave mushrooms to be made into an antidote.Leave his house and travel up north until you reach the cave entrance. Take note of the fact that the doctor told you the cave entrance was west, not north. The cave is also located underwater, so beware, there are Sharks here. Swim through the cave until you reach an area where you can surface. Climb onto the shore, leap over the rock structure on the path, and jump into the water below. Once you reach the vines, surface, then climb up. Continue through the cave, and avoid falling back down into the pool of water below, otherwise you'll have to start back from the beginning.
Once you've reached the second set of vines, you'll climb up to an area littered with small plants on the ground. The plants will emit a gas, and you'll begin to hallucinate. Continue on your way, and climb the vines located in the next area. You'll begin hallucinating again, and the entire cave will flip, causing you to begin walking up the vines as if the cave flipped ninety degrees. Plants will begin to sprout from nowhere, and more of the gas-emitting plants can be found here. - Continue walking until you reach a house. As you approach the house, it will move away from you. Continue following the house through the cave until it stops moving, then enter through the front door. Approach the back door, and it will eventually open, revealing the mushrooms you've been looking for. Once you get within a foot of the mushrooms, the surface beneath you will break out from under you, and you'll fall.
- After you regain consciousness from the fall, you'll find yourself in a much more normal looking cave than before. The mushrooms are just a ways ahead. Pick a mushroom, then leave the cave and return to Dr. Earnhardt's greenhouse by scaling the cliff. Try and avoid falling at all costs.
- Once you reach Dr. Earnhardt's greenhouse, you'll have to enter it from the side door rather than the front. After you've given Dr. Earnhardt the mushrooms he asked for, he'll instruct you to visit Daisy. Leave the greenhouse and walk to the second story of Dr. Earnhardt's home. Entering the room Daisy is in will initiate a cutscene in which you inform Daisy that Grant is dead. The doctor shows up, and you convince him to allow you to keep the rest of your friends at his home if you find any. After the cutscene, you walk downstairs and the mission ends.
|
|
|
the medusa call
Mushrooms In The Deep is the sixth Mission in Far Cry 3. It begins right where the previous mission left you off. After helping save Daisy's life and making an agreement with Dr.Earnhardt that he allow your friends to stay at his home in order to remain safe, Dennis calls, informing you of a ship named the Medusa nearby, telling you to go to it.
OBJECTIVES
Exit Dr. Earnhardt's home and fast travel to Amanaki Outpost far to the east. This will bring you closer to the Medusa. If you've uncovered a fast travel location closer, travel to that one instead. If you've chosen to fast travel to Amanaki Outpost, a Memory Card can be found in this safe house located on the table near the laptop. Pick it up to earn yourself a collectible.
The Medusa can be found just north of this outpost. Find a vehicle, and start driving north toward the location. As you approach the Medusa from the south, you can choose to climb the mountain just southeast of the Medusa and here you will find multiple hang gliders to descend down to the Medusa on. Be careful where you land though, as one of the objectives is to avoid detection from the pirates patrolling the areas surround the Medusa.
It's recommended that you veer off toward the left and drop down into the pool of water at the bottom of the waterfall. This will not alert any enemies if you land it just right, and you will survive so long as you land in deep enough water. If you cannot land this fall correctly, feel free to take another route, so long as you're not detected. The ocean is also a great spot to land, though requires more patience, as there isn't much cover, and the guards may spot you if you're not careful enough. Remember that you will fail the mission if you are detected.
Remember that you can throw rocks to distract enemies. Use this to your advantage when trying to take the enemies out without being detected. There will be a total of six enemies near the Medusa, a total of three pairs. One pair is to the left of the Medusa, another is to the right of the Medusa, and the final group is just farther right of the Medusa. This is all from the perspective of the player facing the ocean. Each pair of enemies includes a regular pirate and a radio operator. If you are detected, the radio operator will run away, and if you let him get away, he will destroy the intel and you will fail the mission. It's recommended that you either bring a silent weapon, or knife every enemy. The checkpoints can be forgiving, and they appear to activate once every time a pair of pirates is killed. After you kill a radio operator, loot his corpse in order to obtain the intel required to finish the mission. There will be three pieces of intel to obtain.
After you've killed each of the three pairs of enemies and obtained the intel, you will need to reach the control room on the Medusa. The control room is located above the deck of the Medusa. Once you reach the control room, activate the radio inside, and listen in on the conversation. After they're done talking about holding Jason's friends for ransom and then selling them on the black market, they realize an alarm has been set at the Medusa, and send in reinforcements to check out the problem.
OBJECTIVES
- Go to the Medusa.
- Avoid detection. Use stealth to kill the patrolling radio operators and get their intel.
- Reach the control room on the Medusa.
- Get rid of the reinforcements on the beach
Exit Dr. Earnhardt's home and fast travel to Amanaki Outpost far to the east. This will bring you closer to the Medusa. If you've uncovered a fast travel location closer, travel to that one instead. If you've chosen to fast travel to Amanaki Outpost, a Memory Card can be found in this safe house located on the table near the laptop. Pick it up to earn yourself a collectible.
The Medusa can be found just north of this outpost. Find a vehicle, and start driving north toward the location. As you approach the Medusa from the south, you can choose to climb the mountain just southeast of the Medusa and here you will find multiple hang gliders to descend down to the Medusa on. Be careful where you land though, as one of the objectives is to avoid detection from the pirates patrolling the areas surround the Medusa.
It's recommended that you veer off toward the left and drop down into the pool of water at the bottom of the waterfall. This will not alert any enemies if you land it just right, and you will survive so long as you land in deep enough water. If you cannot land this fall correctly, feel free to take another route, so long as you're not detected. The ocean is also a great spot to land, though requires more patience, as there isn't much cover, and the guards may spot you if you're not careful enough. Remember that you will fail the mission if you are detected.
Remember that you can throw rocks to distract enemies. Use this to your advantage when trying to take the enemies out without being detected. There will be a total of six enemies near the Medusa, a total of three pairs. One pair is to the left of the Medusa, another is to the right of the Medusa, and the final group is just farther right of the Medusa. This is all from the perspective of the player facing the ocean. Each pair of enemies includes a regular pirate and a radio operator. If you are detected, the radio operator will run away, and if you let him get away, he will destroy the intel and you will fail the mission. It's recommended that you either bring a silent weapon, or knife every enemy. The checkpoints can be forgiving, and they appear to activate once every time a pair of pirates is killed. After you kill a radio operator, loot his corpse in order to obtain the intel required to finish the mission. There will be three pieces of intel to obtain.
After you've killed each of the three pairs of enemies and obtained the intel, you will need to reach the control room on the Medusa. The control room is located above the deck of the Medusa. Once you reach the control room, activate the radio inside, and listen in on the conversation. After they're done talking about holding Jason's friends for ransom and then selling them on the black market, they realize an alarm has been set at the Medusa, and send in reinforcements to check out the problem.
playing the spoiler
Playing The Spoiler is the seventh Mission in Far Cry 3. It begins right where the previous mission left you off. After discovering intel which leads Jason to believe some of his friends are still alive, him and Dennis have only further angered Vaas.OBJECTIVES
- Go talk to Dennis,
- Go to the Logging Camp.
- Get to the vantage point.
- Disable the alarm before it is activated.
- Enter the weapon cache.
- Plant the bomb.
- Get to a safe spot.
- Escape the area or kill all remaining pirates nearby.
- First you must go speak with Dennis in person. He is at Amanaki Town, so you can just fast travel to the safe house there to reach him faster. Once you arrive at Amanki Town, speak with Dennis, and he will warn you that Vaas and several pirates are planning on attacking Amanaki Town. He begs you for your help, and tells you to sabotage Vaas' weapon supply. After you're done speaking with Dennis, head out to the Logging Camp located southeast of Amanaki Town. A car is located on the road near the southern exit of the town.
If you've chosen to drive, just take a left when you reach the southern exit of the town. Head down the road for awhile until you spot a wooden bridge to the right. Cross the bridge, and continue along your way. Just southwest of the logging camp is a radio tower you should activate while you're there. The radio tower is positioned at the top of a mountain, meaning you'll be climbing for a bit until you reach it. At the radio tower's base, there are no stairs. You have to climb up a rope where the first flight of stairs should be. There will be three more rope ladders like this positioned up the tower. After you've gotten up to the top, activate the radio tower, take the zipline down, and continue with the main objective. - Once you reach the logging camp, you'll have to reach the vantage point located near the center of the camp. Once you reach it, you'll be instructed to disable the alarm before it's activated. The alarm is located south of this location.
- f you cling to the left until you reach the front entrance of the logging camp, you should find that there's only one enemy guarding this entrance. Take him out at any time with a silent weapon, or sneak up from behind him when he's facing the opposite direction. Be careful, there is an enemy located in a watchtower just southeast of the front entrance. This front entrance serves as an excellent hiding spot, as a bush is located just to to the right of it. There should only be three enemies remaining in the logging camp. Take them out one by one by luring them over toward the entrance with rocks and then silently killing them with melee.
After you've cleared out the logging camp, enter the weapon cache, plant the bomb, and leave the building before the 15-second timer reaches 0-seconds, otherwise you'll probably die in the explosion. Reinforcements will likely show up, and you can choose to take them out or evade them if you wish. In order to evade them, swim across the river and keep running in the opposite direction of the pirate reinforcements until you're notified that the mission has been successfully completed.
prison break-in
Prison Break-In is the eighth Mission in Far Cry 3. It begins right where the previous mission left off. After destroying Vaas weapons cache and discovering that Vaas has been broadcasting ransom videos from a location named PC short form of Pirate's Cove (Sunset Cove), a prison, you're given the option to explore the island some more or go straight to Sunset Cove to find your friends
OBJECTIVES
OBJECTIVES
- Explore the island, or head to Sunset Cove when ready.
- Approach the camp.
- Kill the camp operator and loot his body to get the prison key.
- Use the key to explore the prison.
- The first objective in this mission is to travel to Sunset Cove. This should be located just west of the logging camp you had to travel to during the last mission. If you're no longer at the logging camp, quick travel to Amanaki Town and head southwest from there. If you are still at the logging camp, there's a Glider located at the radio tower just west of the camp, across the river, and up the mountain. This glider might serve as a useful source of transportation to reach the objective fast.
- There's a radio tower located just southwest of Sunset Cove, and it'd be wise of you to activate it before continuing the main objective. If you managed to grab the glider located back at the logging camp, you should be able to glide all the way to the highlighted objective with it. Rather than heading straight for the objective, veer off toward the left and activate the radio tower first. If you managed to glide all the way here, it's not recommended that you crash into the radio tower. It's very likely that you will fall and die if you do this. You can actually just activate the glider, and without turning, it should take you relatively close to the location of the island with the radio tower and objective on it.
- Once you reach the radio tower, you should receive a call from Dr. Alec Earnhardht, but Daisy will be on the line. After she's done talking to you, start your ascent up to the top of the radio tower. The only obstacles on the way up are a couple crooked stairs you must jump over and a rope ladder to climb up, but that's about it. Once you reach the top, activate the radio tower, and zipline down to a location conveniently close to the objective.
- There will be a guard tower with a single enemy standing in it just north of the zipline's landing position. Take him out quietly, then approach the tower carefully. There is a snake near the ramp that leads up to the tower. You should receive a new objective once you reach the base of the tower. Your objective is to kill the camp operator and get the prison key from him. The camp operator is located somewhere within the northern section of the camp. Before you descend upon the camp and its inhabitants, the smart thing to do would be to climb up to the top of the guard tower you just cleared out, and deactivate the alarm located here. This will disable all the alarms within this camp and prevent enemies from calling in reinforcements if you are detected later on.
- There will be a lone enemy located near the shoreline just north of the guard tower. Silently take him out, then continue to move up toward the camp operator's location. If you wish to do so, the camp operator can be seen from the shoreline. If you're unsure which enemy is the camp operator, take your camera out and zoom in on the two enemies you should be able to see to the west of the shoreline. The camera will automatically place a yellow marker above the camp operator's head. Take him out whichever way you wish, but be ready to take on the enemy located just in front of him, and the two located to the east just behind you. Be ready to fight once the camp operator is killed. About four enemies will spawn near his location. The red barrel near the camp operator's location will be vital at this moment. You cannot simply flee the camp either, as you must retrieve the prison key from the camp operator's corpse.
- Once you've eliminated all of the enemies, loot the camp operator's corpse to retrieve the key. After you retrieve the key from his corpse, you will be told to explore the prison which is located in a cave just south of the camp operator's corpse. There may be an enemy near the entrance, and about three enemies located inside the cave. Enter through the door in the cave, and veer off to the left and up the stairs.
- Once you reach the top of the stairs, there will be three enemies in the room below. Take them all out, and head down the stairs. Be careful though, as two shotgun-wielding pirates will charge at you. Eliminate them as well, continue toward the objective, and where the cave splits off into two paths, another shotgun-wielding pirate will sprint toward you from the right path. Eliminate him, then take the left path. Enter through this door, and pick up the Relic located on the ground just to the left.
- After you've picked up the relic, continue through the cave and watch the video clip being displayed on the wall to the right. After the video ends, do your best to avoid the caged tiger. It can and will damage you through the cage it's in. Continue to wander on through the cave until you find the chair and the video camera. Jason will call out for Vaas, a pirate will appear from behind him, tell him he'll take him to Vaas, and then knock him out.
- The following cinematic displays a concerned Vaas, questioning you about the ink on your left arm, asking if his sister gave it to you. All the while, he's poring gasoline on you and your girlfriend, Liza, who's located just across the room. During this scene, he shows his truly psychotic nature. He ends up lighting a match, tossing it on the ground, and taking the third prisoner, Oliver, away. Despite Jason's efforts to break out of his restraints and save Liza, he instead falls down to the bottom story of the building he's in, and this is where the mission ends.
island port hotel

Island Port Hotel is the ninth Mission in Far Cry 3. It begins right where the previous mission left off. After a psychotic Vaas leaves you and Liza for dead in a burning building, you must rescue her before the flames bring the entire building crumbling down on both of you.
OBJECTIVES
OBJECTIVES
- Rescue Liza.
- Protect the truck.
- After falling down to the bottom story of the burning building, sprint forward toward the stairs, and you should immediately notice the time limit of 3 minutes counting down to your imminent death. Once you reach the second story, head toward the right. There will be fire blocking your path. Wait a few seconds and a water pipe will burst and put the fire out. Continue on your way until you approach more fire, don't drop down to the bottom floor again. Instead, shoot the pipes attached to the pillar toward the right until the fire is put out. These pipes will be highlighted with the Objectivve marker. If you touch the fire at all during this escape, you will be immediately prompted to put it out.
- Head through the open doorway to the right, and climb up the ladder located in the furthest corner of the room to the left. Turn to the right, and sprint across the plank walkway until you reach the blue door. Use your melee attack to break the door down, and slip through the small space in this hallway by moving forward.
- Ascend the fallen pillar toward the right in order to reach the next floor. The pillar will break, and Jason will pull himself back up, preventing himself from falling back down to the bottom floor again. Shoot the pipes on the ceiling in order to put the fire out, and continue on through this hallway.
- Shimmy across the ledge by moving toward the left, enter through the open doorway, and walk across the wooden beam until you reach the concrete platform in the rightmost corner of the room. Climb up the rope dangling off the ledge, and enter the room. A cutscene should begin playing after you enter the room Liza is in.
- Liza reveals that the third prisoner in the room was a friend named Oliver. Jason and Liza escape the building after falling down four or five stories of a scaffolding. A truck is located outside, and as Liza and Jason sprint toward it, an enemy is heard in the background ordering his comrades to destroy the vehicle by shooting the gas tank.
- The truck won't start, and you will have to push the vehicle in order for Liza to be able to start it. After pushing it far enough, Jason will hop into the back and gaze in awe at the building as it collapses. While Liza finds this odd, the main objective now is to protect the truck while Liza drives. You are given a GL-94 grenade launcher to do defend the truck with.
- During this chase scene, make sure to destroy all enemy vehicles trailing behind the truck. After all of the enemy vehicles are destroyed, the truck will eventually die, and leave you and Liza stranded with several enemies approaching. You will then be directed to the front of the truck with a pistol. Kill the enemies that approach the truck from the front while Liza attempts to start the truck back up. An explosive barrel is located near a boulder at the front of the truck. Shoot it if necessary.
- After the enemy infantry has been killed, Liza will start the truck back up and drive the two of you to safety. After she parks the truck, she and Jason talk for awhile, and Jason ends up telling her where Daisy is and that he'll take her there as well. The mission ends with Jason and Liza driving to Dr. Alec Earnhardt house.
keeping busy
Keeping Busy is the tenth Mission in Far Cry 3. It begins right where the previous mission left off. After escaping a burning building with your girlfriend, Liza, you attempt to search for Daisy in the cave beneath Dr. Alec Earnhardt's home.
OBJECTIVES
OBJECTIVES
- Find a way to the cave.
- Find the power head inside the cave.
- Bring the power head to Daisy.
- Speak to Liza.
- After driving you and herself to Dr. Alec Earnhardt's home safety, you must search for the cave Daisy had described to you on the phone earlier. This cave can be found just beneath the gazebo outside his home.
- After entering the cave, a cutscene will begin in which Daisy and Liza are reacquainted. Daisy then informs the two of you that she found a boat that's missing a power head, and you volunteer to go look for it.
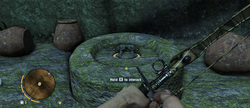
- Head toward the eastern portion of the cave where the waypoint is. The power head is located beneath the water in the leftmost corner of the sunken debris. You can easyly locate this as there is a glowing light at the powerhead.
- After retrieving the power head for the boat, head back to Daisy and she'll tell you to hook it up to the boat. After you're finished with that, head back to Liza who's now at the campfire and speak with her. She'll agree to stay with Daisy to help with the boat while you search for all of your other friends, and then the mission ends.
meet citra

Meet Citra is the eleventh Mission in Far Cry 3. It begins right where the previous mission left you off. After bringing Liza safely to the cave beneath Dr. Alec Earnhardt's home and finding a power head for a boat Daisy found, you've decided to go search for the rest of your friends and rescue them.
OBJECTIVES
OBJECTIVES
- Exit the cave.
- Explore the island
- Travel to the Temple
- Meet Dennis,
- Follow Dennis.
- Search for the object Citra desires.
- Leave Citra's temple.
- You should begin the mission while in the cave beneath Dr. Alec Earnhardt's home. Leave the cave, and you'll receive a call from Dennis telling you to meet him at the temple so you can obtain more power from the leader of their people, Citra. The temple is located far southeast of Dr. Alec Earnhardt's home. It's recommended that you fast travel to the location nearest the temple, Amanaki Outpost. If you've obtained any fast travel locations closer to the objective than this, travel to one of those instead.
There is a radio tower located just north of the temple. It would be wise of you to activate this radio tower before entering the temple. Beware though, there are enemies patrolling the areas surround this radio tower. Ascending this tower is pretty basic. If there's no stairs, look for a ladder. If there's no ladder, look for ropes dangling off a ledge and climb up them. Once you reach the top, activate the radio tower, and take the zipline down to the bottom.
The objective is located just south of the zipline. Be careful of Dingo's located in this area, they travel in packs. They'll bite you, and shooting them may alert nearby enemies. - Once you're in range of the temple, you'll be given the objective to speak with Dennis. The waypoint for this objective will be located directly at the entrance of the temple. Travelling to this waypoint will activate a cutscene in which Dennis grants the both of you access into the temple. After awhile, the cutscene will end, and your objective will be to follow Dennis as he walks you through the temple.
- Once you reach the large tree at the center of the temple, Citra will approach you, give you something to drink, and tell you that she'll help you save your friends if you find what is lost. After drinking from the bottle Citra gave you, you will begin to hallucinate, and after a loading screen you will begin falling toward the earth. After hitting the ground, you'll be at a table with three of your friends. They'll vanish, and you'll be given the objective to search for the object Citra desires.
- Travel forward, following the man in white. Ignore the fact that he can teleport, and that plants are growing around you as you walk. The man will lead you to a building. Enter the building, and you'll be brought to a wooden bridge underneath the ocean. As you cross the bridge, three visions will appear off to the side of the bridge. The first vision will show Keith in the feeble position, with Buck standing over him boasting about the things he's going to do to him. The second vision will show Vaas with a gun pointed at Jason's head, telling him he's gone so far only to fail. The third vision will show Hoyt circling Riley, your little brother, who's sitting in a chair, telling him that he's going to have to work for him, and that he's going to have to follow his rules.
- After you've crossed the bridge, walk up the stairs, and interact with the floating ancient knife on the pedestal. After you've done this, a stone structure will fall on you, and you'll reawaken with Dennis doing something to the tattoos on your left arm. Jason will tell Dennis what he saw, and that he must leave Citra's temple and find the ancient knife he saw.
- Exit Citra's temple the same way you came in, and the mission will end
bad side of town
Bad Side of town is the twelfth Mission in Far Cry 3. It begins right where the previous mission left off. After Citra has agreed to help you save your friends only if you find the missing object, you've discovered that the missing object is an decorated knife located in Badtown.
OBJECTIVES
OBJECTIVES
- Investigate Badtown.
- Visit the bar.
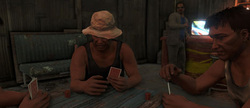
- Play a game of poker.
- Follow the man in white without getting noticed.
- Badtown is located far northeast of Citra's Temple. Open up your map, and you should notice a fast travel location opened up at the mission's waypoint in Badtown. Travel there, and head off toward the bar just east of your location.
- You should be able to recognize the bar from the hallucinations you experienced in the previous mission. Enter the bar, and you should be given the objective to play a game of poker. Head through the opening on the right, and sit in the chair indicated by the glowing yellow light.
- The man in white will walk into the bar, come over to your table, and tell you that you played well. He'll leave the bar, and your objective will be to follow him without him noticing. Leave the bar the same way you came in, and turn to the right. The man in white should stand around with his back facing you for about five seconds, then begin walking. Trail behind him, and make sure you're not too close.
- He'll stop at the first bend in the town's road here, and it's recommended that you stand near the two men who are talking in order to avoid being spotted by him when he turns around. He'll then continue along his way and stop to talk to a woman on the left. Stay near the bend behind the building here, and peak around the corner every so often to make sure he hasn't left yet. After he's done speaking to the woman, he'll continue down the road forward, and then take a left. Don't worry about finding cover just yet. He won't turn around for awhile.
- He'll cross a bridge of a small creek of water, then make the next right. This is where you'll want to be careful. After he makes the turn, he'll stop, turn around, then head off toward the left and enter a building. After he enters this building, the mission ends.
kick the hornet's nest
Kick the Hornet's Nest is the thirteenth Mission in Far Cry 3. It begins right where the previous mission left off. You've just discovered that the town, bar, and man in white from the hallucinations you experienced at Citra's Temple were in fact real. After trailing the man in white for awhile, he's entered a shack in the town, and you must confront him.
OBJECTIVES
OBJECTIVES
- Enter the shack and confront the stranger.
- Go talk to Willis.
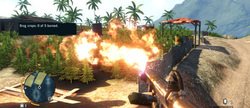
- Burn all the drug crops in the area.
- Find the next drug crops.
- Reach the fishing village.
- Destroy the boat.
- Go talk to Willis.
- This mission is a direct continuation of the previous mission, so the shack you must enter should be located directly in front of you. If not, the shack is located in Badtown, and you will have a fast travel location here.
Once you enter the shack, the man in white can be heard over a speaker informing you that if you don't tell him your name, he'll detonate the building with you in it. You'll tell him your name, and he'll question your respect for America and your patriotism. Eventually he'll lower you down into an underground area beneath the shack, and tell you that he's working as a spy for the US Government and that his name is Willis - Eventually he'll place a Flamethrower on a table in the room and tell you to go torch some of Vaas' drug crops along with his boat. After he's finished talking, pick up the flamethrower, and leave the shack.
Curious about who Hoyt is, Jason calls Dennis and tells him about Willis, saying that he told him Vaas was working beneath Hoyt. Dennis tells Jason that Hoyt is the one responsible for Vaas and everything bad which occurred on the island, and to stay away from him. After speaking with Dennis, you must travel to the drug fields just southeast of Willis' shack.
You won't be able to head directly southeast of your location, instead, head directly east until you reach a road which travels south. Take this road south, wield your flamethrower, and get ready to torch some crops. You should eventually reach a fork in the road, where a car is also located. Hop in the car, and take a left, over the wooden bridge. Continue to follow the road in the direction of the objective. You may be approached by pirates in a vehicle when you get too close to the objective. Hop out, eliminate them, and then head down to the drug fields. - If you don't have the flamethrower equipped yet, equip it, and start burning the crops located in this area. If you run out of fuel for your flamethrower, there's a small shack in the northwest corner of the first set of drug crops with fuel in it.
- Once you've finished burning the first set of drug crops, head north up the road for a bit until you reach the next set of drug crops. You will need to burn all five crops in this area as well. Though beware, there's enemies here. Approach them however you want to. In the end, they'll all have to die, because the burning crops will definitely alert them.
- If you run out of fuel while torching the last five crops, there will be several shacks with fuel in them spread out through the area, one of which is farthest to the west, near the first two of the five crops.
- Continue to burn through the remaining crops and enemies. Once you've finished burning the five remaining crops down, you must travel to the fishing village just south of the crops.There will be several enemies in the fishing village. Eliminate them through any means necessary. You still have a flamethrower, torch the huts and burn the whole village down if you want to. Once you reach the village, you'll have to destroy the boat at the docks near the south end of the village. Eliminate all of the enemies first, then reach the docks.
- Once you reach the docks, the boat will begin to drive away. At the end of the docks on a box is an RPG. Pick it up and used it to destroy the boat before it gets away with the additional drug supply.
After you've destroyed the boat, the mission will end.
|
|
|
a man named hoyt
A Man Named Hoyt is the fourteenth Mission in Far Cry 3. It begins right where the previous mission left you off. You've just burnt down several of Vaas' drug crops and destroyed a boat carrying a shipment of drugs for a US Government spy named Willis.
OBJECTIVES
OBJECTIVES
- Go talk to Willis.
- Leave the shack.
- Go to the rice fields.
- Get to the observation point undetected.
- Secure the area before Rongo is killed.
- Rescue Rongo.
- Follow and protect Rongo as he makes his way to the village.
- Protect Rongo while he searches his house.
- Get the documents from Rongo.
- After destroying the boat with the RPG in the previous mission, you must head back to Badtown and speak with Willis. It's recommended that you fast travel to Badtown, as that will be the fastest way to reach Willis.
- After fast travelling to Badtown, Willis' shack will be located just southeast of your location. Once you reach the shack, open the front door, and head downstairs where Willis is waiting for you.
- Walking toward Willis will initiate a cutscene in which Willis hands you an earpiece to wear, and describes the insanity that grows within someone who spends too much time on the island. He will also play a tape recording of a conversation being had between Vaas and Hoyt. While Vaas remains unconcerned with "Snow White", Jason's nickname given to him by Vaas and the other pirates on the island, Hoyt brings it to his attention that Jason is a threat, and that he needs to be taken care of. After they're done talking about Jason, Hoyt tells Vaas that a town named Paris Town needs to be dealt with as well. This ends the recording, and you must then leave the hut.
After you leave the hut, you must travel to the rice fields just northwest of the hut. There will be no need for fast travelling anywhere. Just head northwest toward the objective. On your way, there will be a radio tower and an outpost. It's up to you whether or not you want to activate the radio tower and liberate the outpost. It's recommended that you do, but you don't have to.
If you've chosen to do either of these additional tasks, the radio tower is the closest. At its base is a broken down car. Climb on top of the car, then to the first section of the radio tower by climbing up the ledge with the ropes dangling off it. Continue to make your way up the tower, avoiding falling off at any cost. Eventually you'll come across more ropes that you have to jump to. Climb up those ropes, immediately turn around, and slowly cross the metal bars until you reach one you can't get passed. Crouch beneath it, and continue to the next set of dangling ropes. Jump to them, take the ladder up, then climb up the next set of ropes. Take the final ladder up, activate the radio tower, and make sure you take the zipline which brings you northwest in order to save yourself some trouble - The outpost will be just west of the zipline's base. Head over toward it, but make sure to remain undetected unless you want reinforcements to be called in.
- Approach the outpost from the ridge just northeast of it, and you'll be able to take out at least two enemies without alerting anybody. This particular time I liberated the outpost, a boar showed up before I attacked anybody, and caused them to light the forest nearby on fire. If anything random occurs like this, use this to your advantage and gain a position deeper into the outpost while they're distracted. There are two alarms located in the center of this outpost, so if you're up for it, you can sprint to one of the alarms, disable it, and then take out the enemies. When the enemies detect you, their reaction is delayed slightly, and they will not run for either of the alarms alarm to activate them immediately, giving you time to deactivate one. Deactivating one alarm will deactivate all of the alarms.
- There are Molotov Throwers in this particular group of enemies. They will light you on fire, and kill you rather quickly. Avoid fighting them in flammable areas like fields of grass or under the cover of trees. Once you've liberated the outpost, continue northwest to the main objective.
- There will be an ancient looking structure in the middle of the road on the way to the rice fields. Don't bother entering it. There's just a bunch of snakes and a corpse. If you do happen to fall into it on accident, look for the stone column with the ropes dangling off of it. Climb up it, turn to the right, jump onto the next column without overshooting it, then sprint-jump to the final column. You'll probably end up having to try this several times before successfully doing it. That's why this place wasn't worth going into. If you explore it a little, there's about six snakes in the second room who will try to kill you, along with a chest with a small amount of money in it.
- Once you reach a fork in the rode, you'll be told to get to the observation point undetected. The observation point is just northwest of this location. Be careful, being detected will cause you to fail the mission.
- f you take a left at the fork in the road and continue following the road, you'll run into a shack with a powerline near it. The cable attached to the powerline can be used as a zipline. Zipline down to the observation point using this, and immediately turn to the left and enter the building. A cutscene will initiate in which Hoyt commands several civilians to run across rice fields covered in landmines. Two of the civilians are blown up, but the man you've come here to extract survives and takes cover just across the rice fields.
- When the cutscene ends, eliminate the two enemies shooting at Rongo as quickly as you can. If you're using a Recurve Bow, the enemies are located about 80 meters away. Kill them both, then sprint toward Rongo. Be careful, there are still landmines in the rice fields. When you are near one, a sharp beeping noise can be heard. When you trip one, it'll explode, and you'll take a ton of damage.
After interacting with Rongo, a brief cutscene will initiate in which Rongo will tell you to take him to the village. When the cutscene ends, quickly eliminate the enemy sprinting toward you, and continue killing the enemies shooting at you. There's no stealth approach to this portion of the mission, just kill everybody as quickly as possible so Rongo doesn't die. - When you finally reach Rongo's house, he'll discover that his items aren't where they used to be. You'll have to protect him from incoming enemies while he searches his house.
- First a wave of enemies will approach from the west, then the north, then the north again, and then randomly. You can effectively defend Rongo if you remain in the house the entire time. In fact, this is the recommended method of defense. Use the explosive and incendiary barrels to your advantage, and be wary of the red dots on your mini-map. Enemies will approach the house quickly, and it'd be wise to take them out before they get inside.
- Once you've eliminated all of the enemies and Rongo's found the transportation manifest, he'll tell you to come retrieve it from him. This will initiate a cutscene in which Jason takes a picture of the manifest and informs Willis that he's gotten the manifest. The cutscene will end, and the mission will end as well.
saving oliver
Saving Oliver is the fifteenth Mission in Far Cry 3. It begins right where the previous mission left you off. You've successfully rescued a man named Rongo who had the manifest of transportation which detailed your friend Oliver's location. Now you must intercept the convoy carrying him, and rescue him from Vaas's crew.OBJECTIVES
- Intercept the convoy carrying Oliver.
- Go to the vantage point.
- Secure the area.
- Use the camera to identify Oliver.
- Wait for the perfect moment to shoot.
- Kill the guards, Oliver must not be taken away.
- Clear a path for Oliver to reach the boat.
- Get in the boat turret.
- Protect the boat.
- The convoy which is carrying Oliver is located just west of Rongo's home. Be careful if you choose to cross through the rice fields. There are still landmines planted in the ground which will explode if stepped on.
There is a radio tower located just southwest of the objective, along with an outpost just south of the objective. It's suggested that you complete this alternate events, but you don't have to. The walkthroughs will no longer explain the activating of radio towers or liberating of outposts. It's expected of you to already know how to complete both of these tasks and find them on the world map. - After you've completed the alternate tasks, if you have chosen to do so, head to the objective. There will be several Komodo Dragons in the area. Eliminate them, or try to avoid being eaten by them. After you visit the objective, you'll discover that you were too late, and Willis will tell you to get over to the vantage point just southwest of your current location. You will be timed, and only have 1 minute and 40 seconds to reach the vantage point. Head over there quickly to avoid failing the mission.
- It's recommended that you find a vehicle to reach the vantage point more quickly. As you will have to reach, and clear the area within the time limit. You will be cutting it extremely close if you choose to sprint there. If you choose to sprint there, you should only have about 30 seconds to secure the area and make it to the vantage point. This is clearly the most awesome way to complete this portion of the mission, so run your heart out, and make sure to touch the objective point after killing the two enemies here.
- After reaching and securing the objective point, use your camera to identify Oliver. After about five seconds, a helicopter will fly by from the left. After about ten seconds, a convoy of vehicles will start driving down the hill toward the right. After you've identified Oliver, who's marked with a blue marker and located in the third vehicle in the line, the enemies with him will shove him around for a bit, then Jason will put the camera away and pick up the sniper rifle nearby.
- After picking up the sniper rifle, take out all the guards, and make sure you prioritize those who have a line of sight on Oliver. Do this quickly, otherwise they'll take him to the helicopter, and you'll fail the mission.
- There will be explosive barrels located in spots which enemies will run to. Make sure you use these to your advantage. Don't worry about conserving ammo, the sniper rifle you picked up will have infinite ammo, though you'll still have to reload it.
- Eventually Oliver will reach a boat at the end of the docks. Protect him while he steals the boat, then jump off the ridge and hop into the turret as soon as he reaches you.
- After hopping into the boat's turret, Oliver will begin to drive it down the river just up ahead. Make sure to protect the boat through this segment, otherwise you'll fail the mission. The enemies along the river will be located near buildings covered in explosive barrels. Aim for the explosives, and the portion of the mission will be a piece of cake.
- There will be several boats and jeeps with turrets along the way as well. Make sure to prioritize the gunner rather than the driver. Don't aim to blow up the vehicles either, they are rather difficult to blow up.
- Eventually a chopper will fly overhead, shooting at the boat with a gunner. This time you'll have to blow the vehicle up. Just maintain a constant hail of machine gun rounds on the helicopter, and don't worry about the turret on the boat running out of ammunition or overheating, it's a super turret. You will take a lot of damage during this boat run, so make sure you bandage up every chance you get.
- After the helicopter is destroyed, you will arrive at the beaches near the Medusa. A cutscene will begin here in which Jason tells Oliver that he'll take him to a safe place. The cutscene continues in the cave beneath Dr. Alec Earnhardt home. Oliver gets to see Daisy and Liza again, but Liza seems worried about you. She says that the island is changing you, but allows you to continue with your goal of saving your friends. The mission will end after this cutscene.
piece of the past
Piece of the Past is the sixteenth Mission in Far Cry 3. It begins right where the previous mission left you off. After saving Oliver, and preventing him from being traded into slavery by Vaas, you've successfully escorted him to the cave beneath Dr. Alec Earnhardt's home where Daisy and Liza greet you warmly. Although Liza is worried about Jason's sanity and safety, she lets him leave the cave to find and save his younger brother Riley before it's too late.
OBJECTIVES
OBJECTIVES
- Exit the cave.
- Go talk to Buck.
- Infiltrate the Nostalgia.
- Find the entrance.
- Infiltrate the Nostalgia.
- Find the laptop in hold of the Nostalgia.
- Hack the laptop to find the knife.
- Backtrack to escape the boat.
- Escape from the Nostalgia.
- After speaking with Liza about saving Riley, exit the cave and you'll receive intel from Willis claiming that a man named Buck knows where Keith is. Buck is located in a bar in Badtown far east of Dr. Alec Earnhardt's home. Fast travel to Badtown to reach your objective quickly.
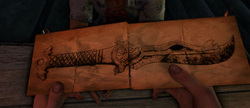
- Once you arrive in Badtown, Buck will be located in the bar directly east of your location. Enter the bar, and approach the man indicated by the objective icon. This will initiate a cutscene in which Jason and Buck speak about Keith's location. You will discover that Buck purchased Keith from Vaas, and that he'll give him back to you so long as you find him what he wants. He'll hand you an image of the ancient knife you saw in a vision earlier, and tell you to seek the man who has its location.
- After you two are done speaking, leave the bar, and head over toward a boat named the Nostalgia just located east of Badtown. The boat is currently afloat, so it's recommended that you snag a boat to travel to it, otherwise you'll have to deal with sharks. You will be able to find a jet ski at the location on the map five images below, just parked at a dock on the shoreline west of the Nostalgia.
- Approach the boat with caution, and if possible, abandon any vehicles you're using to reach it before you are spotted by the patrol on the boat. Climb up the ladder, and make sure nobody spots you. There are several enemies on the boat, and it would be quite difficult to survive if they detect you before you get onto the boat.
- After eliminating all of the enemies on the boat, you'll find the entrance to the inside of the boat on the eastern side through a door. Open up the door, and be prepared to stealth kill an enemy after the loading screen.
- Navigate through the next room, then be careful of the two enemies located in the room after that. One of them will be kneeling on the ground with his back facing you, and the other will be standing up. Eliminate the on who's standing up toward the right, then quickly kill the one kneeling down. This may alert two enemies one floor beneath you. Quickly disable the alarm the enemies were standing near in order to prevent reinforcements from showing up.
- Head on down the stairs, enter the room full of red markers, and eliminate the enemies here. Continue on through the ship until you reach the room with the flashing red lights. There will be three enemies located in this room. Eliminate them, and the door at the front of the room will open to reveal a Heavy Gunner. Be careful, and try to avoid getting pummeled by his machine gun rounds. Try and use explosives to take him out, or a couple shots to the head to remove his helmet and finally his head.
Enter the next room, and interact with the laptop. This will initiate a cutscene in which Jason suddenly becomes a computer hacker, and locates the ancient knife. He hears a beeping noise though, looks underneath the table the laptop's on, and finds a timer attached to a bomb. He sprints out of the room, the bomb explodes, and Jason miraculously survives. - After the cutscene ends, you'll have to navigate your way back through the way you came in, and escape the boat before you drown. Make a left at the first turn, then continue to make your way through the sinking ship.
- When you reach the hatch you must open, open it, and prepare for an interactive cutscene in which you must prevent an enemy from killing you. After you've killed him (hopefully you have), enter the next room and breath a bit of air in by interacting with the air container floating around in the water. Quickly navigate through the next couple rooms, and bust out the window in the final section of the ship.
- A final cutscene will play in which Jason passes out and awakes on a beach with Buck looking down at him. He asks if you found the compass, and tells you that the compass will lead you to the ancient knife. This is where the mission ends.
|
|
|
down in the docks

Down in the Docks is the seventeenth Mission in Far Cry 3. It begins right where the previous mission left you off. You've just found and retrieved a compass which will help you find an ancient knife sought after by Buck, who has your friend Keith captive. If you can find this knife for Buck, he'll release your friend to you.
OBJECTIVES
OBJECTIVES
- Go talk to Buck.
- Follow the compass to locate the entrance.
- Enter the bunker.
- Reach the submarine dock.
- Find the cave entrance.
- Find a way into the Chinese ruins.
- Enter the bunker.
- Explore the Chinese ruins.
- Enter in the temple to find the treasure room.
- Find solution to reach the treasure room.
- Enter the treasure room.
- Pick up the compass.
- Find an exit before everything collapses.
- Although Buck will be located just southwest of your location, there will also be an outpost directly north of you. If you want to, and it's recommended that you do, liberate the outpost just north of your location.
- After you've liberated the outpost, if you've chosen to, head southwest toward the shoreline and speak with Buck. You'll discover that he's known the location of the ancient knife the entire time, and tells you that it's located with Lin Cong and the rest of his stash.
- After the cutscene ends, enter the bunker in front of you. Once you've entered the bunker, head forward, then take a right, and notice the symbols on the wall. Directly above them is a location which you can climb up. Climb up the wall, and hop over to the ledge directly ahead of you. Immediately after you enter this next room, turn to the right, and head down the stairs. Beware though, there are snakes throughout this entire area.
- Jump down the ledge from the staircase into the water below, turn to the left, and head down the pipe. There will be several enemies in this next room, so be careful, and try not to alert anybody. Remember that you're more hidden if swimming beneath the water. Swim beneath the sunken boat, and catch your breath under cover within the cabin. Swim out of the cabin, and head off toward the right.
- Directly toward the right of the sunken boat will be an enemy near the water who's back is facing you. If you've unlocked the skill, you'll be able to perform a ledge takedown, and eliminate this guard without anybody in the room noticing, well, at least not for awhile. Eventually they will notice the body, and remain alert for awhile, but give up on looking for the culprit and continue their watch.
- When none of the guards are looking, swim beneath the water between the boat and the docks until you reach the opposite end of the boat. There will be another cabin here for you to catch your breath. Now eliminating the remaining enemies will be quite difficult without alerting any of them, so go in guns blazing, and hope you come out alive. There will be a Molotov thrower on the boat you swam under near the beginning of this sequence. Avoid burning to death by diving into the water and bandaging up every so often.
- After you've eliminated all of the enemies, take the stairs up to the surface, and head for the cave entrance. Continue forward, take a right, and be careful. There are several enemies up ahead, including a mounted turret. Focus the man on the turret, then eliminate the other various enemies. If you so choose to, you can activate a detonator near the center of the room which will destroy the entrance to the bunker and eliminate a few enemies in the process.
- Once all of the enemies have been eliminated, blow open the entrance to the bunker if you haven't already, and then enter it.
- Walk through this next hallway with caution, as there's a snake just to the left near the wall. Once you've reached the end of the hall, jump into the pool of water below, and prepare to fight a crocodile. If you don't want to fight the crocodile up close, toss some grenades into the water before hopping in.
- After you've slain the crocodile, continue to swim through the cavern, and resurface in the area ahead. Climb up the ledge, and enter the next room. Interact with the door in this room, and jump into the pool of water in the next room. Swim through the arch, then head off toward the next arch on the left. Climb up the ledge, and continue through the following hallway.
- The next room you enter will have a staircase leading down, but the staircase is broken. Make sure you make the jump near the center of it, otherwise you'll have a bad time. Just kidding, falling at this point is unavoidable.
- After you've recovered from the fall, swim forward, and you'll have to find a solution to the puzzle in order to reach the treasure room.
- There will be a room on either side of you. Enter one of them, break the three weak beams supporting the wooden dam, then repeat the cycle in the opposite room to raise the water level high enough to access the treasure room.
- Enter the treasure room, and pick up the compass on the pedestal directly ahead of you. After you do this, the treasure room's ceiling will begin to collapse, and you will have to escape before everything in the room collapses on you.
- Head off toward the left of the pedestal, and shimmy across this wooden platform. Enter the cave ahead, and follow the bright light until a cutscene begins in which Buck finds you once again, and is upset that you haven't acquired his knife yet. You'll stick the two pieces of the compass together, and the compass will begin to emit a light. After this cutscene, the mission will end.
the motherlode
The Motherlode is the eighteenth Mission in Far Cry 3. It begins right where the previous mission left you off. After retrieving another fragment of the mysterious compass, Buck insists that you continue to search for his knife, otherwise he'll have your friend Keith killed.
OBJECTIVES
OBJECTIVES
- Go talk to Buck.
- Explore the mines to find the third compass piece.
- Follow the tracks to explore the mine.
- Get past the pirate encampment and cross the bridge.
- Find the strange door inside the excavation site.
- Enter the mystical room.
- Find the hidden passage.
- Explore the depths.
- Take the old elevator to venture deeper.
- Pick up the third part of the compass.
- Escape the temple before everything collapses.
- Buck will be located just northwest of your location near a dig site just outside a mine shaft. After you approach him, a cutscene will initiate in which he'll basically tell you to explore the mines and find the next piece of the compass.
- After you're done speaking with him, head into the mines and take a right at the first turn. Enter the elevator, and a loading screen will appear. Following the loading screen, head directly forward and push the mine cart forward along the track. An enemy will appear from the other side of the cave.
- As soon as you're finished pushing the mine cart, throw a rock past the enemy to get him to face the opposite direction of you. After diverting his attention elsewhere, sneak up from behind him and kill him. There will be another enemy nearby, though he is drunk and will most likely not notice you. Kill him as well, and continue to follow the tracks until you reach a crate with a Molotov on it.
Peak over the crate with the molotov on it, and you should find that there are three enemies in the next cavern. It's worth noting that the drunken enemies are Molotov throwers, and carry an unlimited supply of molotovs with them at all times. Try and execute the drunken enemy near the entrance of this next cavern while his back is facing you, then eliminate the next two after they've surely detected your presence. - After eliminating these three enemies, several more will show up in the next couple caverns. Be careful, as molotov throwers are abundant in this mission.
- Once you've eliminated all of the enemies, continue to follow the track to the objective. Once you've reached the end of the line, you'll have to get past the upcoming pirate encampment and cross a bridge.
Around the next corner is are two snipers. This shouldn't appear as much of a surprise, as they will shine red beams of light in the direction of the cavern's opening quite often.
There are only four enemies in this next section. This includes two Pirate Defenders and two Pirate Snipers. Be careful when taking out the defenders, as everything on them is heavily armored besides their heads. Search high for the snipers, and eliminate them before they eliminate you. - Once all four enemies have been killed, continue on across the wooden bridge, and two more molotov throwers along with a Heavy Gunner will show up. The molotov throwers are your priority, and are taken out easily. The heavy gunner is more difficult to take out, though you've dealt with them before. Aim for his helmet, and eventually you'll shot it off him. After his helmet's been removed, shoot him in the face to finish him off.
- After these last three enemies have been eliminated, continue along your way up the sloped path, and pick up some ammunition from the ammo crate in this location. Once you've accomplished the current objective, you'll have to search for a strange door inside the excavation site.
- Beyond this tunnel up ahead are three enemies, including two molotov throwers. These next few sections of the excavation site have ceilings supported by wooden pillars. Shoot the pillars when enemies are near them to bring the ceiling down on top of them, crushing them in the process. Be warned though, the enemies can do the same to you, so try and avoid standing near the pillars when enemies are nearby.
- After you've cleared out the first room, the second room features about four total enemies, including a sniper just across the room, up and near a pillar. Eliminate him first, then the others last. After this room's been cleared out, head up the sloped area, and to the door of the mystical room.
- Open the door by interacting with it. Inside is a Komodo Dragon. Kill it before it kills you. The mystical room is just beyond this tunnel.
Drop down into the room below, then continue past the weird turtle-like statue, and directly to the center of this circular room. Pull up on the switch located in the center to unlock the secret passage. Once the secret passage has been opened, enter it, and descend down the stairs. Be careful once you reach the bottom though, there's another komodo dragon down here. - This next cavern is one you'll definitely have to be careful in, as the drop below will kill you, and there are no guard rails. There will be a bit of jumping required, so make sure you're stepping down onto a platform rather than open space, there are several gaps.
- At the point where you've completed the objective which required you to explore the depths, be careful, because there is another komodo dragon on the ground directly in front of you. Eliminate the komodo dragon, then be careful of the snake just to the right of the ceremonial table. Once these two pesky creatures are slain, head down the slope ahead, make a left, and enter hop aboard the gigantic creaking elevator.
- The elevator will eventually break after you've caught glimpse of your objective, and you'll find yourself deep underground with no foreseeable escape route.
- On the path ahead is a snake. Kill it, then continue along your way to the treasure room. You'll have to make the jump ahead, don't simply wander off into the abyss below. There will be yet again another jump, then you'll need to head up the stairs into the treasure room where a friendly komodo dragon will be awaiting your presence.
- Kill the komodo dragon, then claim the the third part of the compass on the table near the end of the room. Ignore the fact that Jason just blatantly activated another booby trap, he's obviously never seen an Indiana Jones film.
- The entire temple will begin to collapse after the third part of the compass has been picked up. Avoid being lit on fire by the fallen goblet to the right of you, and sprint forward toward the exit. Continue to sprint through these next few sections, and notice the friendly reminder to the left reminding you how to sprint just in case you forgot how to
- Eventually you'll reach a bright light, and Buck will be there on the other side of it waiting for you to place the third piece of the compass onto the other two pieces. After you do this, it'll glow once more, and the mission will end.
|
|
|
lin cong, i presume?
Lin Cong I Presume is the nineteenth Mission in Far Cry 3. It begins right where the previous mission left you off. You've just discovered and retrieved the third piece of the compass meant to find the ancient knife Buck wants you to obtain for him in exchange for Keith, a friend of yours who Buck has purchased from Vaas as a slave.
OBJECTIVES
OBJECTIVES
- Go talk to Buck.
- Find a way to the tomb.
- Dive into the cenote.
- Find the entrance.
- Find the way to the tomb.
- Follow the cable to find another path.
- Use the scaffolding to reach the hot water.
- Cross the hot water.
- Reach the tomb entrance, the knife must be inside.
- Find the real tomb entrance.
- Open the sarcophagus and pick up the knife.
- Avoid the traps, get out.
- You must first go speak with Buck, who's located just northwest of your location. The quickest way to get there is to fast travel to Amanaki Outpost just south of the objective.
- Once you reach Buck, you'll find him lying on a rock near a large ravine. He'll avoid telling you anything helpful once again, leave you alone, and you'll have to find a way to reach the tomb and retrieve the ancient knife for Buck.
- Approach a ledge safe enough to jump from. Then jump into the cenote. Nearly any ledge will do, so long as you aim the jump well enough to not hit the sides of the wall on the way down.
- Once you arrive in the pool of water below, head toward the western side of the cenote, and climb up to the cave there. Although the entrance to the tomb can be found rather close to the entrance of the cave, beyond it is a pedestal with a Relic sitting on top of it. Go grab that before you open up the entrance to the tomb.
- After you've grabbed the relic, head back toward the entrance of the tomb, and open it up. Did I say that was the entrance to the tomb? Well it wasn't. You've still got a bit of a ways to go before your each the tomb. Head forward, climb up the vines to the top of the structure ahead, and you'll be able to hear not only dogs, but people as well. Jason suspects that Buck tipped some pirates off, and that's why they're here.
- Peek down through the hole on top of this structure and you should find a pirate leaning down below. He won't be able to spot you from where he is. Drop down on top of him and perform a death from above kill to eliminate him silently. The enemy just ahead will also have his back facing you. Kill him from behind, then turn to the right to find the third and final enemy in this particular region. Kill him, then be careful, as there are dogs nearby who will bark when they spot you.
- There is a Pirate Heavy Gunner just around the corner, and it's almost entirely impossible to avoid being spotted by him or the nearby dogs. Once you are spotted, the bridge in the center of the room will be lowered, and you will have to prioritize either the dogs or the heavy gunner. Once both are eliminated, several enemies in the next room will be alerted and heading this way as well. Once all of the enemies have been killed, take the zipline down to the next platform and continue about your objective.
- Don't bother dropping from the zipline early. Sticking to it the entire ride will lead to you killing an enemy at the end with a death from above kill. Don't let the amount of enemies displayed on your mini-map overwhelm you. A majority of them are located on the floor just beneath this one. Once you land on the platform after taking the zipline, there will be two enemies toward your left, and one behind you. All are of equal difficulty, so prioritize whichever is closest at the time.
- Once the enemies on this floor have been eliminated, try and kill as many as you can on the floor beneath this one without actually going down to that floor. While this prevents you from taking bullet damage, they will still spam grenades, so be careful. A perfectly placed grenade can kill you.
- After you've cleared out a sufficient number of enemies, drop down a floor, and take the zipline across the chasm. Be careful, there's a molotov thrower on the other side. Eliminate the remaining enemies, then continue down the path to the right. Peek over the ledge here, and you should spot at least one molotov thrower. Take him down, then take the zipline forward to the building just in front of you.
Exit the building, then drop down to the scaffolding to the left. Avoid touching the water below. It's quite hot, and will hurt you. Two enemies will confront you. Kill them both, then continue through the cave toward the objective. Once you reach the river of hot water, drop down to the objective point, then continue along the river.
You'll be even closer to the water at this point. There will be several geysers which spurt out hot water spontaneously and deal about one and a half bars of damage. Avoid touching it at all costs, and leap across any gaps between stone platforms. There will be three enemies not too far up ahead of the hot water river located on a stone wall. Eliminate the RPG Shooters first, then take care of the two remaining enemies.
Once these three enemies are taken care of, cross the stone path ahead, then approach the next room with caution. There will be three enemies once again, including a molotov thrower. The molotov thrower isn't a threat at this distance, so take care of the other two enemies first. Once they're done with, kill the molotov thrower.
After the three enemies in this room have been killed, cross the stone path, climb up the vines, hike up the slope, and eliminate the molotov thrower you'll find beyond the sloped path. Once he's been dealt with, head on forward and open up the door using the compass.
Beyond this door is a hallway. Pass through this hallway, climb up the stone wall, and admire the beauty that is the statue in this cave. Once you're finished admiring it, hop down to the platform below, turn to the right, and take the wooden platforms to the bottom floor.
The boiling hot water in this room will rise and lower every few seconds. Avoid getting caught in it when it rises, and use the time that it spends lowering to your advantage. There will be several areas down here which you can jump up onto to avoid being melted during the water's time of rising. Once it lowers, hop down, and continue along the path, searching for a spot to climb up again. Take a right when you've reached the split path, and make sure you crouch beneath the arch in the middle of the platform.
Once you've gotten across the hot water, hike up the path above, and climb up the vines. Once you've reached the ledge above, go forward, then climb up the next ledge as well.
Continue along your way, and go up the stairs. Once you've reached the top of the stairs, use the compass on the stone structure above to open up the entrance to the real tomb. Head down the stairs into the tomb, and be careful of the komodo dragons down here. Kill all of them, then open up the sarcophagus and pick up the knife.
Picking up the knife will activate some more booby traps, because apparently Jason still hasn't learned his lesson. Sprint forward as soon as you're given the opportunity, and continue sprinting toward the door in order to avoid behind scorched alive. The ceiling will be collapsing in the next room, enabling a quick time event. Make sure you press the right buttons to avoid being rushed, then continue through the tunnel to the white light. After you've reached the surface, the mission will end.
|
|
|
unhappy reunion

Unhappy Reunion is the twentieth Mission in Far Cry 3. It begins right where the previous mission left you off. You've just discovered and retrieved the ancient knife sought after by Buck. Surprisingly enough, he wasn't found anywhere near the exit of the tomb you found it in.
OBJECTIVES
OBJECTIVES
- Go to Buck's hut.
- Bring the knife to Buck.
- After taking a breath of fresh air outside of the tomb you just escaped, Buck will not be found anywhere near the exit. Instead, he'll call you up and tell you to meet him at his place. Buck's place will be located just southeast of your location near Badtown.
Fast travel to Badtown, and head south down the road. Continue down the road until just a bit of a ways after you hit the town's walls, then take a left, continuing to follow the road, until you find another road branching off toward Buck's place.
Once you reach Buck's hut a cutscene will initiate in which you give Buck the knife, he hands you the keys to the basement where Keith is being held prisoner, and eventually he shows up down there to kill you both. This will initiate a quick time event in some weird hallucinated arena of Jason's. Make sure you press all of the required buttons, and Buck will be easy to take care of. Once Buck is dead, Jason will take Keith back to the cave beneath Dr. Alec Earnhardt's home.
Once in the cave, Keith will tell Jason that Riley died trying to escape. The mission will end after a conversation between Jason and his girlfriend Liza. It's recommended that you start the mission Social Club immediately after this by staying in the cave and turning off toward the right rather than the left which leads to the cave exit. Here there will be several of Dr. Alec Earnhardt's hallucinogens, including a bowl full of berries. Interact with the bowl to begin this series of three missions.
this knife's for you
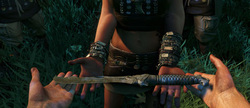
This Knife's For You is the twenty-second Missio in Far Cry 3. It begins right where the previous mission left you off. After saving Keith, killing Buck, and claiming the ancient knife as your own, you've set out to avenge both of your brothers' deaths after discovering that your younger brother Riley was killed.
OBJECTIVES
OBJECTIVES
- Exit the cave.
- Bring the knife to Citra.
- Leave Citra's temple.
- Go talk to the Rakyat Leader
- Leave the cave, and you'll have to bring the knife to Citra. The quickest way to get there is by fast travelling to the temple gateway directly north of Citra's Temple. Once you reach the temple gateway, travel southeast down the road to Citra's Temple. Head into the temple, and you'll find Dennis waiting for you just to the right of the tree near the center of the temple.
- Confront Dennis, and you'll initiate a cutscene in which Citra takes the knife, and you admit that your goal is no longer to save your friends, but to kill Vaas and Hoyt. After the cutscene, you'll have to leave Citra's temple. Just on your way out, Dennis will show up and inform you that some Rakyat people have been taken captive nearby. You'll have to go speak with the Rakyat Leader located just northeast of your location. If you have a fast travel location near the objective, fast travel there, then head straight for the objective.
- The Rakyat Leader is located in a church near the center of the town. Approach him, and you'll be assigned with the task of setting up the explosives. This is where the mission ends.
ambush

Ambush is the twenty-third Mission in Far Cry 3. It begins right where the previous mission left you off. An enemy convoy has taken several civilians as prisoners, and you must help rescue the prisoners. The Rakyat Leader has assigned you the task of planting explosives on a fuel truck parked in the middle of the road which the convoy will eventually approach.
OBJECTIVES
OBJECTIVES
- Place the explosives on the fuel truck.
- Reach the top of the water tower before the convoy comes within sight of the village.
- Wait at the top of the water tower for the convoy to get ambushed.
- Protect the Rakyat people.
- Get in the cargo truck.
- Reach the convoy.
- Eliminate the remaining privateers.
- Save the prisoners inside the convoy truck.
- Leave the church immediately, and turn to the right when you reach the road. Sprint over toward the fuel truck, plant the explosives, and immediately turn around. You're going to have to reach the top of the water tower within 45 seconds.
- Once you've reached the top of the water tower, keep your eyes on the truck which you just planted explosives on. A group of mercenaries will show up (not pirates), their first truck will be blown to smithereens, and you'll have to take out the remaining mercenaries from the top of the water tower. There's a sniper rifle behind you if you're in need of a long range weapon. Even if you already have a sniper rifle equipped, it's recommended that you pick up the one behind you. It's deals loads of damage, and is especially helpful against mercenaries, as a majority of them wear full-body armor including helmets.
- After you've eliminated the mercenaries, the armored truck they showed up in will begin to move away. You will be given about 2 minutes and 30 seconds to sprint to the cargo truck just north of the water tower. Slide down the ladder at the water tower's south end, then head for the cargo truck. Hop in it, and begin to chase after the convoy.
- There will be a roadblock and an enemy vehicle which tries to run you off the road on the way to the convoy. The cargo truck is very durable, so feel free to ram through both obstacles. Once you've reached the convoy, you'll have to eliminate all of the enemies nearby. There should only be about two enemies. Hop out of the truck, shoot them both in the face, then rescue the prisoners located in the convoy truck.
- Open up the back of the convoy truck, and you'll get knocked out by Vaas, thus ending this mission.
warrior rescue service
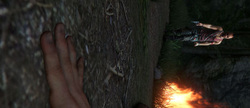
Warrior Rescue Service is the twenty-fourth Mission in Far Cry 3. It begins right where the previous mission left you off. After attempting to save prisoners in a convoy truck, you're greeted by Vaas and immediately knocked unconscious.
OBJECTIVES
OBJECTIVES
- Get out of the cenote.
- Follow the truck.
- Reach the chopper.
- Get out of the mass grave.
- Retrieve equipment.
- Search camp for the equipment.
- The mission begins with a cutscene in which Vaas defines insanity while a man in the background is tossed into a cenote with a rope and cinderblock tied to his ankle. Eventually he kicks you into the cenote as well.
- When you land in the water below, a quick time event will begin, and you'll have to hammer the same button over and over again until you break free of the rope your wrists and ankles are tied in. Swim to the surface immediately after doing so, and swim out through the exit to the east.
- You'll find yourself behind a waterfall without any weapons. Peak your head out, and there should be an enemy with his back turned to you toward the left. Kill him, then make sure you're crouched. Take his weapon, then continue forward and you'll find two more enemies, both of which aren't facing you. Kill the one to the left first, then the one to the right. Take both of their weapons as well.
- Get off the road, and head up toward the ridge to the right. Peak over the ridge, and a helicopter will fly overhead and land just beyond the small outpost in front of you. Before you go in guns blazing, head off toward the right end of the ridge, and drop down as soon as the coast is clear. Head off immediately to the right and hide in the bushes. An enemy patrols this area, and will get close enough for you to kill him with your knife. Make sure to hide his corpse in the bushes as well.
- Once this enemy's been eliminated, climb up to the rooftop of the building to the right of the bushes. Sprint to the other side of the building and hop off. Continue to sneak over toward the next guard tower, and perform a ledge takedown. Climb up to the guard tower, pick up the rocket launcher, and look off toward the left. There should be an alarm on the ground level just ahead of you. Sneak over toward it and disable it, then immediately head off toward the right and jump into the river.
- While you're in the river, swim over toward the right and underneath the bridge. Come up to the surface when the guard ahead of you on the turret is no longer looking in your direction. Sneak around him, walk up the stairs, and take him down from behind when none of the nearby snipers are looking.
- Take cover, and assess the area. There should be two snipers and one heavy gunner remaining. There are also a few dogs, but they are easily avoidable, as they only patrol the area. It's also possible that you'll be extremely unlucky, and several more enemies will appear out of nowhere once the final sniper is eliminated. Make sure you've hid the bodies well. If not, be prepared to hide, or start a huge gunfight. The enemies will be snooping around a lot, but the final sniper's tower is a safe bet, as none of the enemies seem to search it.
- Whether you rely on stealth or straight-up killing everybody in the area, eventually you'll make it into the chopper safe and sound. This will initiate a cutscene in which you hold a gun up to the pilot's head and force him to fly you out of here. Unfortunately a nearby pirate has an RPG and shoots you down immediately after you take off. As you crawl out of the wreckage, Vaas will show up, ask you if he's ever told you the definition of insanity, and shoot you in the chest.
- When you reawaken, you'll find yourself in a pile of corpses. A quick time event will begin, and you'll have to escape the pile of corpses by pressing the correct buttons. Once you've escaped, you'll discover Dennis at your side, finding it remarkable that you're alive. A lighter in your pocket stopped the bullet (somehow) that Vaas fired at you. This was the same lighter that Vaas placed in your pocket earlier when you saved Liza from the burning building. Dennis will immediately leave to go tell Citra what has happened, while you must go retrieve you're stolen equipment from the pirates.
Just north of your location is a radio tower. Undiscovered or not, ignore it, as it's located outside of the mission's boundaries. Instead, head directly north to the objective, but don't get caught by the enemies. For some reason no matter how many times Vaas gets the chance to, he never takes your knife. You'll be restricted to only melee attacks until you retrieve your equipment or steal an enemy's weapon. You won't even have binoculars to spot enemies with.
Be careful, as there are Komodo Dragons in this region. First, head over toward the shack closest to the camp's entrance. Inside is a landmine and an armor vest. Don't even attempt to run into the camp and eliminate everybody with only these. There are several enemies here, including Molotov throwers. - You should be able to eliminate all of the enemies starting from the southeastern most and ending with the man in the chair near the road. The landmine will serve of greater use later. There are two huts in this portion of the camp. One contains C4, and the other contains a flare gun. Once you've obtained all of the contents this area has to offer, continue toward the northwest until you stumble upon a heavy gunner. Shoot the heavy gunner with a flare, then prepare to knife two dogs to death. Once all three enemies are taken care of, enter the hut just ahead of you.
- In the room farthest to the left is a cabinet which holds all of your stolen equipment. Interact with it, and the mission will end.
new rite of passage

New Rite of Passage is the twenty-fifth Mission in Far Cry 3. It begins right where the previous mission left you off. After being "killed" by Vaas twice, you've recovered the equipment that was stolen from you, and must once again speak to Citra
OBJECTIVES
OBJECTIVES
- Meet Citra.
- Defeat the Ink Monster.
- Finish it off.
- Rather than immediately fast travelling to Citra's Temple, head up north to the radio tower you were unable to activate prior to the last mission ending. The ascent isn't too difficult, and once you hit the top and activate it, feel free to open up your map and fast travel to Citra's Temple.
- If the above doesn't apply to you because you've already activated this radio tower, fast travel directly to the temple gateway, just north of Citra's Temple.
Head to the very back of the temple to find Citra. Walking near her will initiate a cutscene in which she tells you to drink a poison that causes the weak to die. Once you drink the poison, your vision will be blurred, then it will become nighttime.
Stand around for awhile while some crazy stuff happens, then the monster she mentioned earlier in her stories will arise from the temple in front of you, and you will have to defeat it. You will be given an infinite amount of explosive arrows to complete this mission with. Aim for it's mask, and fire a constant barrage of arrows at it to prevent it from attacking you. When it does attack, it will unleash a breath of purple fire in your direction. Hide off to either the right or leftmost side of this area to avoid taking damage from the flames. - Once the giant monster vanishes, everything will become very dark, and two black monsters wielding knives will come chasing after you. Fire your arrows at them when they're at a distance, and make sure to keep your eyes on both your mini-map and screen while you're fighting them. Some of the environment may still be on fire, and these two enemies can teleport, so they're not too predictable. If you're ever given the option to eliminate one through a stealth kill, do it.
- After you've killed the two black monsters, the giant ink monster will return without a mask. Its face is still its weak point, so fire as many arrows at its face as you can. The monster will now hurl a series of four balls of water in your direction, so remain moving through this entire phase. After four balls of water are hurled, it will take about a five second break, bringing its face closer to you, then attacking once more. The balls of water will damage and stun you for a duration of time. Attempting to kill you one last time, the monster will breathe fire at you once more. Dodge the fire, then fire more arrows. Once the monster falls, you will have to stab it in the eye.
- Run up its fallen arm, and a quick time event will begin. Hit the correct buttons, and you'll eventually slay the monster by stabbing it multiple times in the eye. The entire scene will fade away, and Citra will appear on top of you half naked. After having had sex with Citra, the two affectionately touch hands, and Jason arises from where he was lying, speaking to the Rakyat people as if he is their leader.
- The mission will end with you appearing on an island just south of Vaas's island.
payback

Payback is the twenty-sixth Mission in Far Cry 3. It begins right where the previous mission left you off. After defeating a giant black ink monster and having sex with Citra, you must now travel to Vaas' island and avenge the lives of your brothers.
OBJECTIVES
OBJECTIVES
- Reach Vaas' island.
- Enter the compound.
- Find and kill Vaas.
- Fight through the compound.
- Vaas' island should be directly north of your position. Head to the shoreline, and jump off the ridge to the water below. Swim across this stretch of water until you can spot the guard on the dock directly north of you. Begin to approach him underwater, and from the right side. Once you're within range, perform a ledge takedown on him, then crawl up onto the beaches of the island.
- Just around the corner are two pirates harassing a civilian woman. Eliminate them both, then continue onward toward the compound. There are about three enemies and two dogs in this area. Feel free to be avoid being stealthy if you want to, you won't alert anybody by taking these guys out with an RPG. There will be one enemy located in a guard tower toward the right end of this area, and the rest of the enemies can be found on the left end. Once you defeat them, climb over the wall with the ropes dangling over it, and you should recognize the song playing. It was also played during the three-part mission The Social Club.
- Don't worry about alerting any of the enemies beyond the fence line. You cannot use any weapons at this time, and you cannot reach them from where you are. Enter through the door, and go up the stairs. You'll begin feeling dizzy, and suddenly all of the monitors in front of you will display Vaas' face. He'll tell you that he knew you were coming, and then the entire building will catch fire. You may also catch fire, so put it out immediately.
- Once you're no longer on fire, sprint ahead through the door, and you'll fall through the floor and down to the room below. Continue along your way until you reach a room with a ladder in it. Climb up the ladder, pull out a long range weapon, and shoot the tiger's cage.
- After shooting the tiger's cage to free the tiger, eliminate the man who's operating the turret mounted to the vehicle. Beyond this first confrontation, it's just a matter of being able to heal up when necessary, and avoid incoming molotovs. Now would probably be a great time to jump off the rooftop of this building as well, because it will eventually be on fire. There is one more tiger's cage near the objective point. Free the tiger inside it so it can unleash its rage onto the oncoming enemies
- Once you've eliminated all of the enemies here, approach the opening within the large door marked by the waypoint. Enter the building, then walk through the door to the left. As you walk through this room, Vaas will eventually appear behind you and stab you in the chest with the ancient knife. It will disintegrate, and you'll collapse to the floor as Vaas walks away from you.
- When you awake, you'll be standing on a floating platform made up of several monitors displaying static. Walk forward, and a path will create itself for you. Continue to walk forward, and a vision will appear on the left with you pointing a gun at your head. A second vision will appear to the right which shows Vaas pole dancing on a stage. The image of Vaas will occasionally change to Citra, then back to Vaas. The third and final vision to the left will show Vaas having sex with you, fully clothed, but the two characters (you and Vaas) will alter between you, Citra, and Vaas.
- Eventually a flight of stairs will appear, with Vaas waiting on a platform at the end of the stairs. Walk up the stairs, and Vaas will reveal to you that Citra is his sister. You'll pull a gun on him, and he'll grab it as well, telling you to shoot him. Pull the trigger, and you'll be set onto another platform with visions of Vaas sprinting toward you with knives. Shoot and eliminate them while progressing forward toward the objective. They can and will kill you. You will also be unable to sprint past them and avoid them.
citra's favor

Citra's Favor is the twenty-seventh Mission in Far Cry 3. It begins right where the previous mission left you off. You've just discovered that Vaas was Citra's brother right before killing him. After killing him, you awoke with Citra looking over you, back at her temple.
OBJECTIVES
OBJECTIVES
- Go talk to Citra.
- Leave Citra's temple.
- Speak with the rescued friends.
- You will reawaken near Citra, who will tell you that Hoyt was the cause of Vaas' insanity. You tell her that you will let your friends leave without you, while you stay on the island with her and avenge both her and your brothers. After speaking with her, you will have to leave the temple to go speak with your friends.
- On your way out of the temple you'll run into a drunken Dennis who will tell you about his life as an immigrant in America. He's quite obviously jealous of your sudden relationship with Citra. After he's done speaking with you, leave the temple, and fast travel to Dr. Alec Earnhardt's home to go speak with your friends.
Once you reach his home, travel to the cave beneath it, and you will initiate a cutscene in which you tell your friends that you want to stay on the island. Liza will get upset, and then the cutscene will end. Before exiting the cave and continuing the next mission, you may choose to speak with Oliver and Keith. Oliver will tell you that he's chosen to stay on the island with Dr. Earnhardt, but you'll convince him to go back home and tell his (Jason's) mother what happened to her kids. Keith will be as boring as usual and say absolutely nothing heartfelt. After you're done speaking with them, the mission will truly be over, and you can leave the cave.
fly south

Fly South is the twenty-eighth Mission in Far Cry 3. It begins right where the previous mission left you off. Citra's convinced you to stay on the island with her and let your friends leave by themselves. After telling your friends that you plan on staying on the island, Liza tries to convince you to come with them, and cries when you refuse. This results in the entire group of friends becoming extremely sad, while you continue along your path of vengeance.
OBJECTIVES
OBJECTIVES
- Exit the cave.
- Go talk to Willis.
- Reach the airstrip.
- Save Willis.
- Protect Willis.
- Kill the remaining pirates.
- Talk to Willis.
- After making everybody depressed, exit the cave beneath Dr. Alec Earnhardt's home. You're going to have to talk to Willis, so fast travel to Amanaki Outpost to save yourself the trouble of walking. Once you arrive in Amanaki outpost, travel north to the shed, and you'll contact Willis via radio. He'll tell you that he's flying to Singapore, and that Hoyt's island is on the way there. If you can make it to his plane before he takes off, you can hitch a ride with him.
- You'll be given 5 minutes to reach Willis' airstrip. It's located northeast of your location. If you've captured an outpost nearby, fast travel to it and save some time. If not, you're going to have to drive fast. There should be a Quad Bike just next to the shed you spoke to Willis at. Hop on, and get to the airstrip fast.
- Once you're within distance of the airstrip, the timer will vanish, and Willis will call and tell you that pirates are preventing him from taking off. You're going to have to prevent him from dying, and eliminate all of the enemies quickly.
- After you've eliminated all of the enemies attacking Willis, he'll have to make repairs to the airplane before it's operable again. Protect him from incoming enemies while he repairs the airplane. Enemies will first approach you from the south, so hop onto the mounted turret and eliminate them. You won't be able to use this turret for long though, as several waves of enemies will soon arrive from the west. Eliminate them as well. My only suggestion is that you have something like a grenade launcher on you, as two vehicles with machine gun turrets will show up eventually.
- After the repairs have been made to the airplane, and the enemies have been eliminated, hop into the plane. After an extended cutscene, you'll jump out of the plane and use a wingsuit to survive the landing. From now on, you will have a wingsuit and parachute to survive long falls with. Once you deploy the wingsuit, the mission will end.
|
|
|
three blind mice
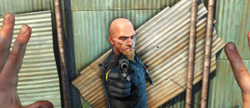
Three Blind Mice is the twenty-ninth Mission in Far Cry 3. It begins right where the previous mission left you off. Hoyt resides on the southern island of the Rook Islands. Luckily for you, Willis was just on his way to Singapore, so he gave you a lift over the island along with a wingsuit and parachute to land on the island with.
OBJECTIVES
OBJECTIVES
- Talk to Willis.
- Land in the south island beach drop zone.
- Kill the pirates and take their truck.
- Find Sam at the Crazy Cock bar.
- Talk to the privateer about the secret poker game.
- Play poker with Sam.
- Follow Sam into the alleyway.
- This mission begins on your way down to the south island where Hoyt resides. By now your wingsuit should be activated, and you should probably be aiming for the beach if at all possible. Pull back in order to make the distance needed. Once you are a certain distance from the ground, you'll be told how to pull open your parachute. Pull it open, and land on the beach below.
- Once on the beach, you'll have to kill some pirates down the beach east of your location. This can be done by shooting the nearby tiger cage, and using that as a distraction while you eliminate them one by one. Make sure you eventually kill the tiger as well. Once they're all dead, hop in their truck, and head southeast to the Crazy Cock bar where Sam is located.
- The bar is located in a small village, and you'll have to exit the truck in order to access the village. Enter the bar through the front door, take a right, and ask the bartender if he knows anything about Sam. He'll tell you about a secret poker game in the back. Go speak with the privateer in the corner of the bar, and he'll let you into the game.
Head down the stairs, and take a seat at the poker table. Do whatever you want in the first hand. During the second hand you'll whistle the tune Willis told you to whistle, and Sam will quit the game and head out to the alleyway outside. You'll quit as well, and have to leave out the left door, up the stairs, and into the alleyway where Sam will ask who you're working for. When he hears you say Willis' name, he asks how he is, and wanders off. The mission ends here.
doppelganger
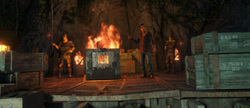
Doppelganger is the thirtieth Mission in Far Cry 3. It begins right where the previous mission left you off. After finding and speaking with Sam, he's decided to wander off away from you for no reason. Now you must find him and ask him about Hoyt.OBJECTIVES
- Find Sam and ask him about Hoyt.
- Carefully approach the cenote.
- Enter the cenote via the stairs.
- Approach the entrance to the dock.
- Find an alternate route into the dock.
- Climb aboard Hoyt's ship.
- Quietly eliminate the recruit and take his uniform.
- Allow the privateer officer to scan the ID.
- Join the other recruits and meet Hoyt for orientation.
- Use the boat to leave the cenote.
- After Sam decides to leave you alone in the alleyway, you must travel to the building southeast of your location, and head upstairs. Here you will find Sam attempting to get through the door. Approaching him will initiate a cutscene in which he describes how the locals recognized him as a bad guy due to his German accent. When you ask him about Hoyt, he makes the connection, and realizes that you're Jason. He'll say that he has to hide you, otherwise Hoyt will find you and kill you. He eventually suggests that you steal a uniform from a privateer and use it to become one of them.
- Once Sam is finished talking, he'll lead you outside, and Dennis will call you to tell you that Citra believes you will become the ultimate warrior and that you're path is almost complete. After he's done talking to you, leave the town, hop into the nearby vehicle, and head down south to the cenote.
- Once you arrive at the cenote, you cannot let any enemies spot you until you've changed clothes. You can't kill anyone either, and you will only be able to access your camera.
- Get within range of the enemy sitting in the chair in front of the stairs, and toss a rock over toward his right. Once he gets up to go look for the source of the sound and he has his back turned to the stairs, crouch, and sneak down the stairs. You'll be able to cross this next section without the two enemies below spotting you as well. You will then come across an enemy standing in your way, and not with his back facing you either. Wait awhile, and he'll eventually leave his post.
- Follow behind this enemy, but not too closely behind him. As soon as he gets into this next room and within range of a second enemy, duck and hide behind the boxes to the left, and peek over every once in awhile. When it gets to the point where the only enemy in the room is the one sitting in the chair, sneak around him toward the right side of the room, and drop down to the level below.
- Continue through this next section, and toss a rock to the area left of this next enemy to get him to wander away from the ramp below. Once he's out of the way, walk down the ramp, and continue to the objective.
- You'll eventually run into an enemy facing a dock. At the same time, you'll be given the objective to approach the entrance to the dock. Backtrack a bit, and toss a rock down the hallway toward the enemy. Before he turns around, duck and hide in the foliage, and allow him to pass by before you enter the next area.
- Head down the ramp, take the route behind the waterfall, then continue up the next ramp. Don't worry about any of the enemies in this room spotting you. The next room is what you have to worry about.
- There will be two guards off to the left in this next room. Don't worry about them, and head off toward the right behind the wall made of leaves. Toss a rock through the hole in here, wait about 10 seconds, then toss another to the left of the two enemies you just passed. Wait for those two enemies to have their backs turned toward you, then head down to the right, and make sure you don't drop down from the ramp, otherwise you'll alert the enemies in this room. Sneak past them, then head out to the next area.
- You'll have to take cover immediately after reaching this next area. Hop into the water, then swim to the back of Hoyt's boat. Climb up the ladder, then eliminate the recruit and steal his uniform.
- After putting the recruit's uniform on, you'll call Sam and he'll tell you how to fit the part of the recruit. Once Sam's finished talking to you, continue along the side of the boat, and walk up to the officer to have your ID scanned. He'll ask if you're up for a task that'll earn you some extra money, you'll say that you are, and he'll talk about overthrowing Hoyt. After this conversation, he tells you not to mention it to anybody, and you'll continue about your way and meet Hoyt for orientation with the other recruits.
- During the orientation, Hoyt will tell the story of his father the diamond miner, inform the recruits of his rules, and burn a man alive inside a furnace for breaking one of the rules. After the orientation, jump into the water below, swim over toward the boat back inside the main outpost, and drive it out of the cenote. After this, the mission will end.
|
|
|
triple decker
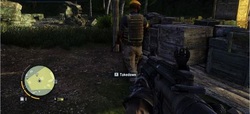
Triple Decker is the thirty-first Mission in Far Cry 3. It begins right where the previous mission left you off. After Jason gets his new clothes that allow him to blend in with the mercenaries, he gets a call from Sam warning him that if he's caught doing anything suspicious, the privateers will fire on him. Jason talks about a possible way to gain Hoyt's trust, by killing the mercenaries who are working behind his back. Sam then gives him directions to a place where he thinks a list of names is being kept.
OBJECTIVES
OBJECTIVES
- Go to the old temple.
- Kill 3 VIPs and search them for evidence.
- Leave the area.
- Make your way to the base shown above. Once there, you'll have to kill 3 "VIPs." These men have berets on and are generally looking over a table of maps and papers, although they occasionally walk around. One is stationed under the tent on the lower level, and the other two are at the highest level. It is highly suggested that you have the takedown drag and the loot takedown skill. Drag will let you quickly move their bodies, and since you have to loot them to look for the list, loot takedown makes you instantly loot them as you kill them, saving time. In this mission, it is easier to start at the top and work your way down.
- Go up the stairs until you see the entrance to a cave; there are two of the three VIPs in this area. The first one, who stops to look at papers in a small shack at the far side of the area, can be quickly killed when he stops. The room he's in hides his body from the view of the others. The next VIP is located in the cave. Before killing him you should take out the guards surrounding him.
- After taking out the guards, it's a simple matter to go up behind the VIP while he's look over the charts. Be careful while doing taking out the guards because right down the stairs is a heavy duo, and they make the stealth method much more appealing. If you were successful in being stealthy, you can walk right back down to the entrance to the camp. When you walk back down the last flight of stairs, the last VIP should be located near the tent to your right. There are three guards in the general area, so you should take them out before going for the VIP. Since it he is the last you have to kill and loot, you can just kill him and run, but it makes escape much more difficult.
- After killing the last VIP, you then must make your way across the road and up the hill. Here you will call Sam and let him know you didn't find the list; but, you did find the time and date of a meeting. He then tells you to come over to help him defuse a situation, and the next mission begins.
defusing the situation
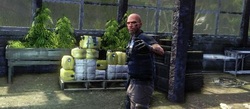
Defusing the Situation starts with Sam asking Jason to come over because "he has a situation to defuse." Jason then goes to meet Sam at the Mahina Plantation (Alpha Camp).
OBJECTIVES
OBJECTIVES
- Go to the plantation.
- Follow Sam to the bomb location.
- Protect Sam while he defuses the bomb (3).
- Meet Sam at the gate to the plantation, he'll let you know that every so often pirates plant bombs in the fields, and that you two need to defuse them. Follow him to the first bomb.
- When he starts to defuse the bomb a timer will pop up, showing how much time is left. During this time, you must protect Sam from the attacking pirates. A failure to do so will make Sam leave the bomb, causing the countdown to stagnate. While he is defusing the first bomb a large amount of the attacking enemies will have molotovs, making the chances good that at some point you'll have to stop to bat the flames out on you, so be prepared.
- The second bomb will have enemies coming at you down a hill, in one of the fields. If you have any long-range weapon, here is a good place to use it. Be careful; there is a sniper in the water tower, and near the end of the countdown a Scavenger with a turret will arrive and start shooting. If you can take outs its machine gunner early, it should pose no problem. After the bomb is defused, follow Sam up the hill to the next one.
- This defense is nice: you are provided with a mounted gun. Grab hold of it and fire upon enemies as they approach. There are flammable barrels scattered about as well, and can be used to strategically take out opponents. Be careful, occasionally enemies will advance at the edges of where the gun can swivel, so be aware. Near the end a helicopter will fly in from the left. Aim for the cockpit and it should go down fairly quickly. You will then enter a cutscene, and Sam tells you of another possible location for the list of traitors.
deepthroat

Deepthroat is the thirty-second Mission in Far Cry 3. It begins after you talk with Sam. He will thank you for the last mission, then tell you of a place where the list of traitors might be. Head to the location to begin the mission.
OBJECTIVES
OBJECTIVES
- Explore the island, or go to the gorge when ready.
- Approach the mining camp from the river.
- Breach the camp without triggering the alarm.
- Use the camera to observe the meeting.
- Take a picture of the meeting now.
- Stop the pirates from leaving. Find an RPG and shoot their 4x4.
- Get the role sheet from the private boss.
- You start the mission near a river that leads to one of the Mercenary bases. When yoou enter the base, there will be a series of ziplines that go back and forth throughout. Use them to get to the next checkpoint, and as long as you don't assault any guards, you should be able to do so unhindered.
- Once you reach the checkpoint in the tower, take your camera out and photograph the meeting. Once you do that, a countdown will start, telling you the time left until the target gets away in a vehicle. Slide down the zipline, dash through the tunnel and the two guards, and grab the RPG that is resting on the crate. Fire at the left vehicle and destroy it. Now the target cannot leave, but your cover is blown and the enemies will start to attack. A little past the crate that had the RPG is an entrance to a mineshaft to the right. Dash in there and use it as cover while picking off enemies. Don't worry about the target-- your first RPG blast should have killed him.
- When most of the enemies are cleared out, use the zipline to get to the other side of the gorge. Several more enemies will come out of entrances in the rock, but never more than 3-5 at a time. Stay back, use explosives and cover, and slowy make your way up the path. When you get to the top of the ridge, be wary of snipers and enemies on the other side of the gorge, they can make healing difficult.
You will have to use ziplines two more times, but you will then find yourself near a shack to the left of the bridge. Several enemies will be waiting for you, shoot the explosive barrel to take a majority of them out. A couple more will come up over the hill.
Done with the enemies, go get the list from the dead boss in the middle of the bridge. After you obtain it, several enemies will surround you on both sides, and you are forced to jump off. Deploy the wingsuit, and glide your way to freedom and a escape ride. Get in, and Sam will call. He'll they set you up with Hoyt, and tell you to come to him.
all in
All In is the thirty-third Mission in Far Cry 3. After you talk to Sam and he tells you that Hoyt wants to chat, go meet him in fron of Hoyt's HQ.
OBJECTIVES
OBJECTIVES
- Go to Hoyt's HQ
- Talk to Sam
- Meet up with Sam in the basement.
- Interrogate the prisoner.
- When you make it to Hoyt's Fortress, Sam will be waiting outside. He tells you to put on your best "Poker Face," and you both head inside to see Hoyt.
- Hoyt tells Sam to leave so he can talk to you alone. After feeling you out, he asks what your hobby is; Jason likes to "hunt." In order to see you work, Hoyt sends you down into the basement with Sam.
- Taking you to a cell block, Sam explains that you will be interrogating a prisoner. He also says to "smile" because Hoyt is watching from a security cam. After and interesting and violent severl moments, Sam pulls you away, calling your poker face one of the best he has ever seen. Hoyt meets you, complements your work, and leaves. Sam then lays down a plan that will allow you to kill Hoyt.
paint it black
Paint It Black is the thirty-fourth Mission in Far Cry 3. After you talk to Sam about his plan to take out Hoyt, you go to take out the mercenaries' communication satellite.
OBJECTIVES
OBJECTIVES
- Get to the communications center.
- Plant the charge on the door.
- Door breached. Enter the bunker.
- Get topside to the satellite dish.
- Plant an explosive device on the satellite.
- Prevent the enemy from disarming the bomb.
- Board the chopper and escape with Sam.
- Sam takes you above the communications outpost, and you drop in via wingsuit. Aim for the field to the right of the actual base. There many normal enemies throughout the base, as well as two heavies, so it is suggested that you use stealth (at least for the beginning). If you climb the right hill, you should be able to drop into a trench that you can use to get part way to the entrance door.
- When you get to the end of the trench, you will see a short, open patch of land in front of a truck and tall grass. Make sure no one is watching, and quickly make your way into the grass. You can move in this grass all of the way to the right of the entrance doors. Here you see the problem; there are two heavies patrolling the doorway. If you have the "Heavy Beatdown" skill, you can distract them one by by throwing stones, making them close enough to the high grass to takedown. If not, you'll have to distract them with a stone, then quickly move up and plant the charge on the door. Either way, blow the door open and go inside.
- As you decend the stairs, the entrance behind you will collapse, so you won't have to worry about the enemies you snuck past. They room below will have several normal enemies and one heavy with a flame thrower. Use explosives (if you have them) to take out the heavy, and make sure to grab the flamethrower. There are two more heavies in the bunker and sustained flames make them go down much quicker. There are several other rooms you have to make it through, but when you reach a hallway with a heavy in the dead center, like the picture below, be warned: the next doorway you go through will have flaming barrels decending on you.
- Take out the enemies on the stairs, and "make your way up top." There you will see the thing that you have to destroy; the radio reciever. Kill the enemies there and then plant the bomb. Sam will anounce that he's coming, and you will have to hold off the enemies until he gets there. Get onto the the platform that surrounds the reciever, and use it as a pinch point. If you still have any flametrhower ammo, now would be a good time to cook. Hold them off, then jump onto Sam's heli. After that, detonate the explosive.
black gold
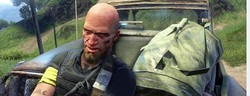
Black Gold is the thirty-fifth Mission in Far Cry 3. After you destroy the communications center, you and Sam head over to the fuel depot in order to spread more chaos. There are 4 specific areas you have to destroy.
OBJECTIVES
OBJECTIVES
- Go talk to Sam
- Drive into the fuel depot with Sam.
- Bring Sam near the fuel reserve maintenace building.
- Hold this ground and puch back enemy reinforcements until Sam returns.
- Everything is going to explode! Escape with Sam.
- Meet Sam outside the fuel depot in order to attack (you also get to find out that Sam is American, who knew, right?). Be aware of the meter at the top of your screen-- it's Sam's health. If he dies, you fail the mission, but as long as you don't do anything stupid he can take care of himself fairly well. This is the setup: you driving, Sam in back on machine gun. You have to plant charges at four fuel reserves throughout the depot, split up into these points: northeast, northwest, southeast and southwest. Once you plant the bomb, you will have 20 seconds until it detonates, so run like hell. Since it doesn't matter which order you hit these in, they will have their own specific instructions below.
- NORTHEAST In this building there is a pretty small amount of troops, but there is one heavy, so beware. Also be cautious about parking Sam in this area- you have to position him so he can defend you, but it's easy to leave him too out in the open and risk failing the mission. Kill the heavy, plant the bomb, and get out. At the fuel reserves here there is also soldiers and a heavy, but the ammount is slightly increased. Still one heavy, but the number of normal enemies has increased. The nice part is the that it it's just an open room, so something like the flamethrower would work quite well.
- SOUTHWEST This one can be tricky. The place you need to place the bomb is in the second room of a large building packed with enemies-- including a heavy. In addition there is only one entrance, making it slightly difficult. Here is where you can utilize Sam. Drive out front and let him pick off enemies as they come through the door, making sure that no enemies are approaching from behind, of course. Plant the bomb and run, it's a little harder to get out of this area.
- SOUTHEAST This reserve is located in an elongated version of the northwest room. Nothing too special, by now you know the drill: Kill em'. plant it, run. After you have destroyed all four of these places, you must then drive Sam to the maintainence building. Here, you will stay in the truck and cover him while he plants a bomb. Several trucks and a plane, as well as a large number of infantry, will come at you. Aim for the drivers/pilots of the vehicles, and use the explosive barrels scattered across the field to take out foot solidiers. After the bomb goes off, Sam will hop into the drivers seat and take off. In a pretty epic event, the camp around you starts to blow up, and you must shoot your way out. When you and Sam make it out, he congradulates you.
aced in the hole

Aced in the Hole is an important mission chiefly because it is the last chance to manually save your game (instead of relying on the auto-save). Sam Becker will warn you that once you commit to the mission, you cannot go back.
Take it as a hint and save the game if you wish to see all the endings in Far Cry 3.
Last Chance to SaveThe last chance to save your game before trying to get the different endings is before speaking to Sam Becker to start this mission. Do it, or you will be sorry.At the beginning of this mission, you meet Sam outside of Hoyt's compound. He warns you that there is no going back from here, and a text box appears saying that you will have to finish the game from here, no more saves. You walk inside and begin Hoyt's poker game, five card hold-em'.
After the first round is over, Hoyt stabs Sam in the neck and kills him. Hoyt explains that he knew you were Jason Brody the entire time, and made you torture your own brother for the fun of it. Hoyt then says that he sold your brother to someone who "likes them young" and he is at the airport now. From this point on, you are playing for your life. The first round you win, and nothing happens, and Hoyt "forgives" you. He then asks what your price is, "every man has a price." In the second, you only have a pair of 4's. Hoyt "because he is generous," says he will only remove one finger every time Jason loses. His left ring finger is removed, and you black out to find yourself fighting against Hoyt in a strange environment.
Next comes a series of quick-time events. A useful tip: the location of where it tells you what button to push, on the screen, generally is correlates to where the button is on the gamepad. You can then use that to have a faster response time. Eventually, you will stab Hoyt through the side and kill him.
Once you have killed Hoyt, you will come out of your daze to see the room your were in to be completely destroyed, with your dead former captors mutilated. Realizing you must escape, you leave the building.
betting against the house

Betting Against the House is the thirty-seventh Mission in Far Cry 3. I starts as you begin to make your way out of Hoyt's house in an attempt to get to your brother, who is being held at the nearby airport.
OBJECTIVES
OBJECTIVES
- Search the airport to find and rescue Riley.
- Protect the helicopter.
- After looking around and seeing all of the damage you've done, it's time to save Riley. Now that you've killed Hoyt, all of the camp is pissed at you. Leave the room, and start make your way down the stairs, but stop halfway. Coming through the door should be a heavy and a couple of other normal enemies. This is a great opportunity if you have explosives; one rocket can do a ton of damage while they are in this area. If not, you'll have to empty rounds into the heavy, while continuously going back up the stairs in order to heal yourself. Once the heavy is down, taking out the other enemies shouldn't be too difficult; they'll be behind cover on the opposite corners of the room.
After the room is cleared you can head outside to face more combat. There will be several enemies at the base of the steps, and in a couple minutes a scavenger should come and join them. At this time you should notice the countdown at the top of your screen. This indicates the time you have to make it to the airfield before Riley is gone. Quickly take out surrounding enemies (this can be done by firing from the doorway, giving you an easy way to duck out if you have to heal) and make your way to the truck. If it was destroyed in the firefight, there should be one a little farther down the road, but it is suggested that you take this one. Once in, make your way to the marker. - Along the way there will several obstructions, including (but not limited too) roadblocks, helicopters, foot soldiers, and other hostile elements. Once you get to the airfield, these enemies will not follow you, so it is generally advised for you to keep on course, no matter what might occur. Don't stop to fight them off; this mission is timed, and the number of enemies can be staggering at times.
Follow the road to the objective (use the map if you have to) and blow through any roadblocks. This may cause a problem if your vehicle is flipped or destroyed, but if this occurs, you can either attempt to steal an enemy truck or simply respawn at the beginning of the mission. Either way, once you get to the airfield the countdown will stop and you will then have to find Riley. - A good method to use would be to systematically sweep the yard; Riley is located at the far end to the left in a red building, but it is inadvisable to run straight there. Slowly get there. using the surrounding buildings as cover to take out enemies. This can take a while, but if careful, it can work well.
Once you get to the building, there are two things you should be aware of: one, the building on the other side of the re spawns an infinite amount of enemies in groups of 3 or 4 every few seconds, and two, the building with your brother in it has a heavy. Go after the heavy; the building has good defenses. In front of the building is a cage wall separating you and the heavy-- careful, he'll use his flame thrower to light you up from the other side. Instead, you'll have to go through the entrance to get the him, where you can take him out (feel free to use any method you've learned up to this point). In the next room over will be a red door. Open it up, get your brother, and head to the helicopter you saw in the yard. - Now that you're in the helicopter, it's time to see if Riley's pilots licence can be adapted for a different type of flight. As Riley takes off and attempts to get a feel for the controls, you have to fight off everthing the mercs send at you. Using the mounted gun, you'll have to destroy the soldiers, cars, boats and helicopters. Riley has to make several passes of the camp before he can head out, so you'll have to be protecting for a while. Pay attention to the health bar at the top of the screen; if you take too much damage, you'll die and fail the mission.
Tips for success: aim for the vehicles first: they take out the powerful machinegun and give off a nice explostion. Always be on the lookout for explosive barrels on the groun. you can use them to take out groups of enemies. Helicopters can be brought down quickly by taking out the pilot; they might even spin out of control and take out some other things with it. Remember; even if you fail the first time, you've still gained valuable information on where enemies will be so you can anticipate. - Once you finally get away, you tell Riley you're going to "someplace safe," and you head to the good Doctor's house.
the doctor is out

The Doctor Is Out is the thirty-eighth Mission in Far Cry 3. Not really a true mission, it's more of just a checkpoint that explains things.
OBJECTIVES
OBJECTIVES
- Search for survivors
- Go to the helicopter
- In an attempt to get Riley to safety, you go to Dr.E's house. To your surprise, the house is on fire and appears to have been attacked when you arrive. You tell Riley to stay near the helicopter, and you to look for survivors.
- Under the pavilion, you find the doctor badly hurt. All you are able to get from him, before he passes away, is that your friends were taken to the "temple." Pissed and confused, you head back to the helicopter and take off for the temple.
hard choices

Hard Choices is the thirty-ninth and final Mission in Far Cry 3. It begins as you get out of the helicopter, and is the last mission of the game. Although it should be obvious at this point, this walkthrough has spoilers.Below is the ending of the game,so evaluate your need to see it.
OBJECTIVES
OBJECTIVES
- Meet Citra
- Choose
- Getting out of the helicopter and walking through the temple doorway, you see Citra. You quickly approach her and demand to know what is happening. Before she answers, you notice that Riley is being taken captive behind you. When you turn around, Citra blows a strange powder into your face and you lose consciousness.
- Waking up, you see that your hands are bound above your head and that Citra is looming over you. Questioning your relationship with your friends, Citra challenges you to do "what you were meant to do," and come become the true warrior. She then disappears through a doorway.
- After a slight struggle, you manage to get yourself untied. You then follow Citra into the red fog. A few steps in, the fog opens to show a long walkway lined with warriors and flames. As you walk forward, the dragon dagger appears in your hand. A few more steps later, and one of the warriors turns into Lisa and bursts into flames. She questions your actions and your title of warrior, then disappears. Your dagger also dissolves in your hand. Farther on, another warrior transforms, but this time into Lisa. She questions your actions, if it was the real you. She also disappears.
- Near the end of the walkway, you can start to see a pavilion. Suddenly, after a flash of lightning, Lisa and Daisy appear standing on either side of it, both the size of a giant. After another flash of light, both are then wearing the masks of the giant from the tribe's story. This shows you that this is what she expects you to overcome, you must defeat your friends who are holding you back in order to become a true warrior.
- Citra is waiting at the end of the path with the Dragon Dagger. Take it from her, walk forward, and all of a sudden your surroundings change. You are holding the knife to Lisa's throat, and you are given two options.
- Save Your Friends
- Join Citra
